
You may recall a couple of weeks ago on June 12, the Beyond the Garden Basics podcast featured myself and America’s Favorite retired college horticulture professor, Debbie Flower, talking about protecting your outdoor plants in containers from the searing summer heat. That conversation was recorded during a live presentation at the 2023 Harvest Day festivities, put on by the Sacramento County, California Master Gardeners at the Fair Oaks Horticulture Center.
Today’s podcast is the rest of that live presentation, where we discuss tips for “Saving Time, Money, and Water in the Garden”. Meanwhile, in this week’s newsletter, we have more advice for dealing with extreme heat in the garden this summer.
Want the main points of the podcast?
Don’t use garden soil in containers. The mix of sand, silt, and clay particles clogs pores and prevents proper drainage.
Keep garden soil additions under 20% if you insist on mixing it in. And only use sterilized soil to avoid introducing weed seeds, bad fungi, or pathogens.
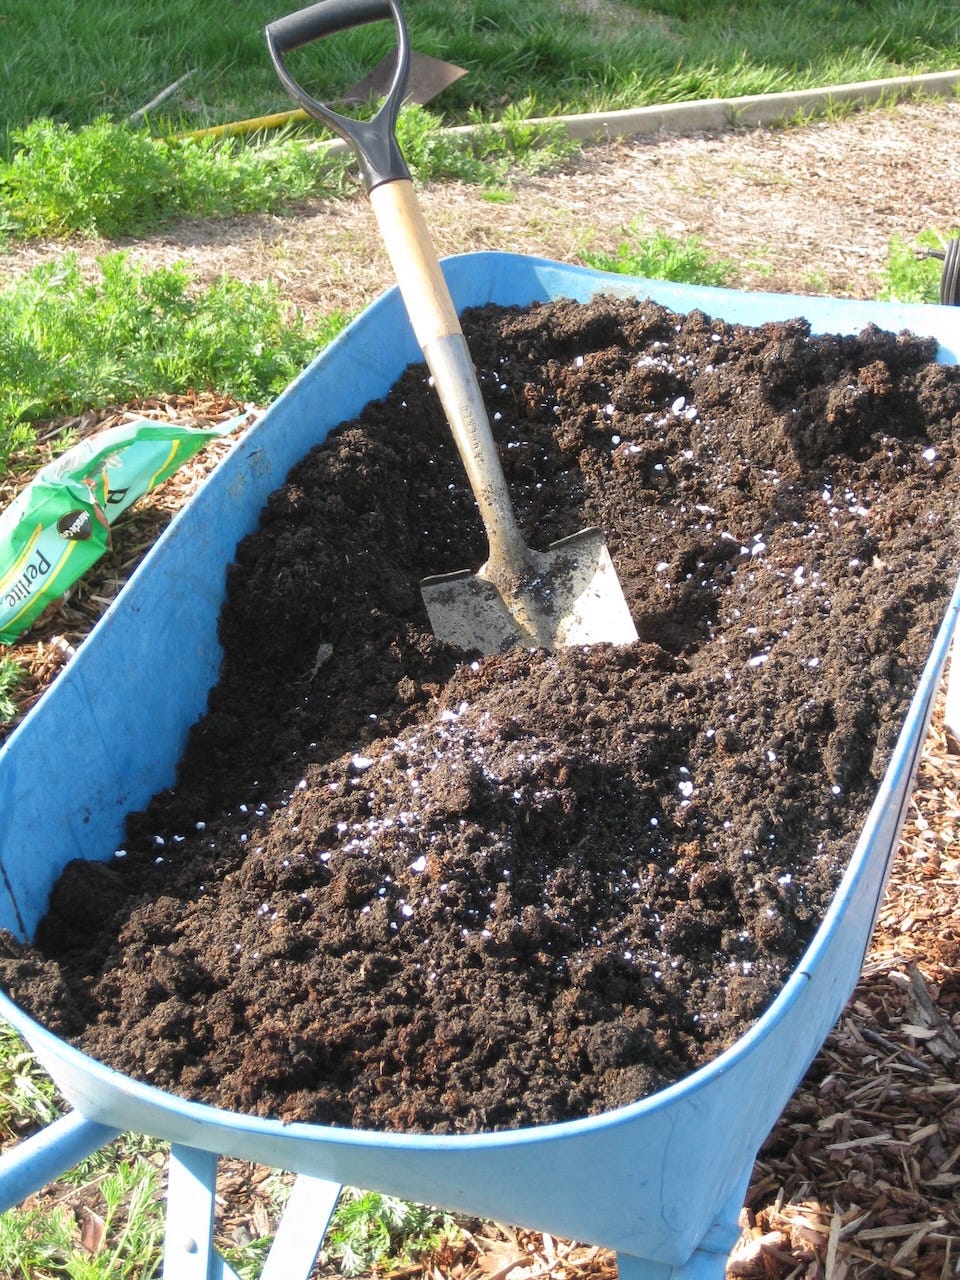
Make your own potting mix using a 1:1:1 ratio: organic matter (peat, compost, coir, or shredded wood) + pumice + vermiculite.
Avoid perlite if you can. The fine dust is a serious respiratory irritant; vermiculite or pumice are safer alternatives.
Reuse old potting mix by treating it as the organic component. Just remove old roots and add equal parts pumice and vermiculite to refresh drainage.
Wet potting mix before filling containers. Dry media is often hydrophobic (especially peat and wood-based mixes) and may never absorb water properly once in the pot.
Water the containers until water flows out the bottom. Surface watering often only penetrates 1–2 inches; if water exits immediately, the soil ball has contracted and water is running down the sides. Rehydrate the entire soil ball in a bucket of water, or add more of the mix along the edges.
Leave ½–1 inch of headspace at the top of containers so water can pool briefly and then wet the entire media surface before draining out the bottom.
Never put gravel, pot shards, or styrofoam in the bottom of containers. Water stops at the texture change and saturates the soil above it rather than draining better.
Exception for very tall containers only. Commercial interior landscapers’ tip: sealed milk jugs in the bottom can fill dead space, since feeder roots only go 30–36 inches deep anyway.
Avoid saving seeds from F1/hybrid varieties. Offspring will revert to parent plants with unpredictable flavor, size, and color.
Safe to save seeds from open-pollinated/heirloom varieties. Tomatoes especially, since they self-pollinate when temps are under 86°F.
Don’t save seeds from cucurbits (squash, melons, cucumbers) unless you control pollination. They cross-pollinate freely with other cucurbit species.
To control cucurbit seed purity: hand-pollinate early in the morning before bees arrive, then bag the fruit to prevent further cross-pollination.
Let vegetables bolt (go to flower) at the end of the season. Flowering carrots, onions, herbs, and arugula attract beneficial insects and pollinators.
Winnow saved seeds from a bag of deadheaded seed heads with a gentle fan or breeze: pour them from a height, the light chaff blows away and seeds fall straight down into a large container.
Store saved seeds in paper envelopes inside zip-lock bags in the refrigerator. Cool and dry is critical; heat or moisture kills seeds.
Seeds are generally viable for 2 years. Test old seeds with a germination test before planting a full bed.
Germination test: place 10 seeds in the crease of a folded, moist paper towel, roll into a cigar, stand upright in a covered mug, check daily, keep moist. If 7 of 10 sprout, you have 70% germination. Plant accordingly.
Speed up pepper seed germination by soaking seeds in hydrogen peroxide for 10 minutes before planting. This cuts the typical 3-week germination time roughly in half.
Triple Digit Garden Protection Tips
When triple-digit temperatures hit this summer, day after day, we tend to hunker down in the cool indoors. Your lawn, annuals, perennials, trees, and shrubs, however, must contend with the abnormal bouts of successive days of 100-degree temperatures. Here are some tips from various nurseries, Master Gardeners, water agencies, and others on how to have a thriving garden during future heat waves, and yet save on your water bill:
• Go with the low flow to reduce runoff and increase the water that can get into your soil. Use soaker hoses instead of sprinklers for irrigation. Or invest in a drip system that can cut water use by as much as 90%.
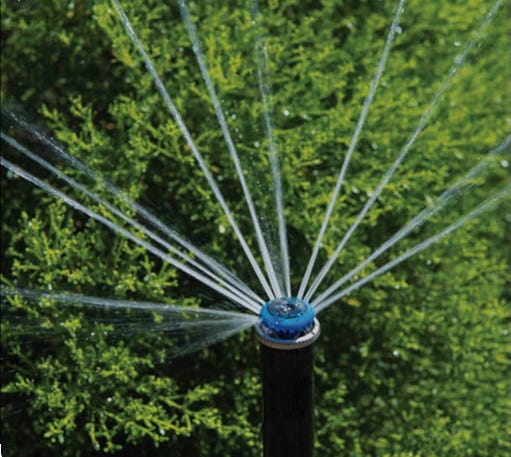
• Swap out old, inefficient lawn sprinkler spray heads with newer, low-flow nozzles that send out rotating, finger-like streams of water that are less susceptible to evaporation by the wind.
• Consider installing a “smart controller” for your irrigation system. This can save water by helping to calculate your water requirements and automatically adjust watering times as the weather changes. Many newer controllers also can use an available smartphone app to control their use manually.
• Irrigate early in the day. Watering early in the morning when temperatures are cool, and the winds are calm will minimize evaporation.
• Go deep. Water less often and more deeply. This encourages deeper plant root systems that can better tolerate dry periods.
• Get in the zone. Group plants with similar water needs together on the same irrigation circuit to make watering easier and more efficient.
• Slow down moisture loss in potted plants in dark, plastic containers by plunking them into larger, decorative containers. Put mulch between the sides of the larger and smaller pots.
• Mulch like mad. Create a three-inch layer of organic material such as chipped tree trimmings or shredded leaves over the top of the soil. This will reduce moisture loss, moderate soil temperatures, and control weeds. Mulch will return nutrients to the soil as it breaks down. Be sure to keep the mulch a few inches away from the stems or trunks of plants to avoid rot.
• Count on compost. Add compost to the soil to increase the soil’s ability to absorb and hold water, and to slowly release nutrients to plants. This reduces stress, making them less susceptible to pests.
• Feeding plants? Use a slow release, organic fertilizer to discourage excessive plant growth that attracts pests and increases water needs. Don’t fertilize during heat waves, though.
• Go native. Consider replacing declining plants with a species better suited to our climate, such as plants native to our area or plants from similar climates, such as the Mediterranean area and Australia. Once established after about three years, many of these plants can survive on rainfall alone.
• Planning a major landscape makeover? Make the plans now but wait awhile before digging. The best time to plant is in the fall when the weather starts to cool. Winter rains will help these plants establish deep, healthy root systems before they the weather warms up next spring and summer.
• The less lawn, the better. Lawns need more water than most other landscape plants, so consider reducing or replacing your lawn with water-wise ground covers, low maintenance perennials or a porous hardscape.
• Mow lawns less often and raise the height of your mower blade to three inches. The longer grass will shade roots, lessen evaporation, and inhibit weed growth.
• Get wise to the weeds. Keep up with controlling these unwanted plants since weeds compete for water.
• Weeds in a garden bed? Chop, don’t pull, those weeds. Pulling may adversely affect the roots of nearby desirable plants.
• Plant vegetables close together in blocks instead of rows to create shade for their roots and reduce evaporation. Leave room between plants for good air circulation, however.
• Choose vegetable varieties that will produce a lot of food on one plant, such as tomatoes, squash, and peppers. Get your sweet corn at the farmer’s market.
PODCAST TRANSCRIPT: SAVE TIME, MONEY, WATER IN THE GARDEN
Farmer Fred:
[0:00] Good morning! We beat the heat! Isn’t that nice? Yay!
Debbie Flower:
[0:05] It’s so good, to have a somewhat cool morning to do this.
Farmer Fred:
And there are going to be three speakers here. There’s going to be two more talks after we’re done here. We’re going to hold all questions until the end because we have to move out of here to make room for the next speaker. So if you have questions, hold them to the very end, and we’ll be over at that white tent over there to answer your questions. So we’ll do it that way because we get sidetracked a lot into scenic bypasses, and it’s very possible that it’s going to happen again.
We are here theoretically to talk about saving time, money, and water in your garden. We’ll call it summer garden tips.
Debbie Flower:
[0:47] All right. All right. I’ll go with that. Good.
Farmer Fred:
[0:49] Debbie Flower, of course, America’s favorite retired college horticultural professor. I’ve learned amazing amounts of gardening information and horticulture information in the years that she’s been sitting in on the podcast. It’s almost like a private education. But I’ve discovered the secret. What you need to do is listen to the podcast episode more than once. It’s amazing what you can learn again by listening to it twice or three times. And every week I learn something new. For instance, she told us last week that soil that you have in your garden... Is basically mostly rocks and air.
Debbie Flower:
[1:29] Yeah. A little bit of organic matter. 2%, 2% to 3%. Yeah. Yeah. That’s true.
Farmer Fred:
[1:35] But the rocks would be sand, silt, and clay. That’s right.
Debbie Flower:
[1:40] Based on their size. Sand being the biggest, silt medium, and clay the smallest.
Farmer Fred:
[1:44] Okay. But I’d never realized that organic matter was such a small percentage.
Debbie Flower:
[1:49] Yes. Of what it is. Very small percent.
Farmer Fred:
[1:51] But that brings us to container gardening. And we all like to do container gardening. We’ve talked about this on the program as far as why you don’t want to use your garden soil, in a container because… well, you tell them.
Debbie Flower:
[2:10] Hi. He stopped talking so I can talk now isn’t this a wonderful event. I just have to say it’s all put on by volunteers completely put on by volunteers heads up to them yeah yeah.
Farmer Fred:
[2:24] Hey, we’re volunteering, too.
Debbie Flower:
[2:25] We are, yes. Yeah.
Farmer Fred:
[2:27] But why don’t you want to use garden soil in a container?
Debbie Flower:
[2:29] Garden soil in a container has a couple of problems. The number one problem is poor drainage. Because it consists of sand, silt, and clay, particles of different sizes, they fit together too tightly. So the sand will make big pores, but then the clay can get into those big pores and clog them up. And so you don’t get good drainage. Water in soil doesn’t just drop through the air, like we see water coming out of our faucet in our sink or we see rain coming down. The water in soil travels around the edges of all those sand, silt, clay, and a little bit of organic particles. The closer those particles are to each other, the less space there is for that water to travel, and it takes much less ability to go through that soil. So we want to use bigger particles. And anything you buy in a container has been grown in soilless mix. You’ll find people who will say, I like to put some soil in because it adds some life to the soil.
Debbie Flower:
[3:28] That’s okay, but sometimes that life needs to be only a little bit. I’d say less than 20% if you want to do that. I don’t do it. I don’t advocate it, but some people really want to do it. But it has to be sterilized. They think it adds life, but some of that life it adds is bad life. There’s good fungus and bad fungus. There’s good bacteria and bad bacteria. There’s good seeds and bad seeds, meaning weed seeds and the seeds you want to grow. And you can introduce all of those bad things in by adding any of the soil out of your garden. So we don’t do it. In production, where money counts in a commercial greenhouse, you can’t have failure due to those bad diseases getting around or weeds in your greenhouse. So we use soil-less mix. And soil-less mix is basically three parts. You look up any recipe. You break it down. The Cornell University recipe is probably the most commonly used as a basis. It’s three parts. It’s organic matter, which is one part. So that can be peat moss. Where I worked in Oregon, it was shredded wood. It can be compost. It can be coir, which is coconut. Coconut, yeah, the stuff outside of a coconut. It comes in pellets, apparently. I don’t use coir much. We did when I was teaching and it was a pain in the butt because you have to soak it for 24 hours before. So you have to, and then we only use part of it, and then we have this bucket of soaking coir, and now what are we going to do with that? So it became sort of a pain in the butt. So anything that’s organic, one third that, one part.
I always recognize this. If you’ve ever been in the hospital, you’ve seen these (plastic urinal). Okay? I use this as my “part”. One part of, I use actually buy container media in a bag, because it’s mostly organic matter. One part of that into my, this is a kitty litter box, okay? This is my little one. I have a big one, too.
Farmer Fred:
[5:22] We’re saving money here. Yeah, yeah.
Debbie Flower:
[5:23] I buy regular stuff. Don’t need anything special. You know, this could be a cottage cheese container or a salsa container or something like that. But it’s a “part” something that you’re using it to measure. So, one part of that organic matter, one part of, I like pumice, comes in this bag. It’s lava rock. If you buy some, I’ll pass it around. Well, you can’t. Everybody can’t see it from here. All right.
Farmer Fred:
[5:50] But pumice is small.
Debbie Flower:
[5:51] Pumice comes in sizes. Yeah. And this is horticultural pumice, and so it is a certain size. Pumice is good for holding moisture but also creating open spaces in your media. And so I would do one part of pumice, put that in, and then perlite is an option. I don’t have any perlite with me. Perlite is heated and expanded rock. It’s white. And the reason I don’t like it, I have some around for very special situations, but is it’s very, very dusty to the point where I’ve inhaled it and coughed for days afterwards. It’s not just I have to get it out of my system right now. It goes on and on. The dust is really irritating. And so I would have students water it down when we worked with it. But that didn’t seem to, that didn’t work well enough. So I tried to get away from it. So I use vermiculite, which is a different expanded rock. This expanded mica. Mine is wet. It holds moisture as well. So we’ve got one part of the organic matter, one part of the pumice, one part of the vermiculite. I could use sand. I could use, instead of any of these, what else would you use? The perlite we talked about. And mix that together. And that’s a good planting mix. You’re going to need some nutrition at some point, but that’s a good basic planting mix.
Farmer Fred:
[7:07] I’ve always been intrigued by what you see on a label of potting mix. If you go to any nursery or hardware store and you see bags of potting soil, potting mix, raised bed mix, and you look at the ingredients, and one of the lead ingredients in most of those is forest byproducts. Right. What the heck is forest byproducts?
Debbie Flower:
[7:27] Well, that takes me back to when I worked at an ag experiment station outside of Portland, Oregon. It’s wood products that have been chopped up. That was our organic component for our mix, but we used it only as an organic component, and then we added the other rock products to it, and the rock products open that up, allow for good drainage, allow places for roots to grow.
Farmer Fred:
[7:50] I think we should move to the piece de resistance of this presentation for saving money, and that’s reusing old potting soil. How many of you have old pots scattered around behind the garage, behind the greenhouse, wherever, and they still got the old soil in it? There’s no plant in it, but there’s soil in it. Did you know you can use that soil again? But how?
Debbie Flower:
[8:12] It’s pretty easy.
Farmer Fred:
[8:13] Okay.
Debbie Flower:
[8:14] First, I go back to my trusty kitty litter box, bring the pot with soil, dump it out. There’s going to be roots and stems and old parts of the old plant. So I get those out, put them in my green waste can. What happens to media over time is that the organic component breaks down. Just like a compost pile. Organisms get in there, chew it up, it gets to be smaller and smaller and smaller. And the water movement through that media gets worse and worse and worse. And in fact, it’ll shrink from the sides of the container. And you’ll think you’ve watered that plant really well because it’s water coming out the bottom. But what the water is actually doing is traveling across the top, down the sides and out the holes. And if you were to put that moisture meter inside the media itself, it’s dry. Often that’s the reason plants die. Either they’re not getting any water because it’s going down and around, or they’re sitting in water, which is a way to rehydrate a plant that Isn’t absorbing water from the top, but it gets too wet and it can’t drain because the pore sizes have disappeared. So if you’re using what’s right out of the bag that you buy for container media. It’s primarily organic matter. There’s a few pieces of some rock product in it, but it’s primarily organic matter. So that has broken down, and that’s what you have now in your kitty litter box. And so you’re going to consider that your organic component. So I measure it with my trusty measurer. One, two, and then I’ll add pumice, vermiculite, the same amount. One, two pumice, one, two vermiculite, mix it all together and reuse it.
Farmer Fred:
[9:53] Well, wait a minute here. I bet it needs water.
Debbie Flower:
[9:57] Yes. I know not everyone who instructs in horticulture advocates for this, but i always wet the media before i put it in the container. A couple of reasons for that: one, the container you’re going to grow in has drain holes If the media is moist, it will not fall out the drain holes when you put it in. Number two is if the container is deep, and this is even, it’s not a very big container, but it’s deep enough. If you put dry media in here and water it, it may never get wet. Because a lot of container media contains hydrophobic particles. Peat moss is hydrophobic, meaning it will not absorb water readily. Some wood products are hydrophobic, and most everything you buy in bags is wood products. And so you have to manipulate it with your hands to get it wet. Once it’s wet, if it doesn’t dry out totally, it will continue to be able to be re-wet. So I wet it first in my kitty litter box, and then I put it into my containers.
Farmer Fred:
[11:02] And the kitty litter box has no drain holes, so it’s sitting there for hours in water. And then you can get to the fun part of grabbing a handful of that wet soil and putting it into a pot with holes and let it drain out.
Debbie Flower:
[11:13] Then you have to go wash your hair to clean your fingernails. It’s all a process, you know.
Farmer Fred:
[11:21] Dirty fingernails for a gardener is a badge of honor. Let’s face it. Yeah.
Debbie Flower:
[11:26] Dirty and broken.
Farmer Fred:
[11:28] Can we do a little scenic bypass here?
Debbie Flower:
[11:30] Of course. We’re best at that.
Farmer Fred:
[11:32] Watering containers. A lot of people don’t water containers enough. They go down their row of containers with their hose, and maybe it’s hopefully on a shower setting, and it’s a little bit here. Or they go like this. Yeah, go like that.
Debbie Flower:
[11:47] I’ve seen students do that.
Farmer Fred:
[11:48] Do that sometime when your soil needs water, and then dig down. Go down four inches or six inches, and you’ll be amazed that the water level has only penetrated maybe an inch or two, and everything below that is dry. The tip I have, and the tip we use, is when you’re watering container plants, water that container until water flows out the bottom. If it flows out immediately, that means it’s too dry, that the soil ball has contracted, and the water’s rolling down the sides. If it never comes out, you’ve got a bigger problem. You’ve got a container with either clogged drainage or no drainage.
Debbie Flower:
[12:29] And when you do fill a container with new media, you want half an inch or an inch of what’s called headroom, so space between the top of your media and the top of the container, and that gives you space to fill up with water. The media is so well-drained that if you just water in one place, it’ll only get wet in one carrot-shaped wetting pattern. So if you want the whole thing wet, you need the whole top wet, and you do that by having space on top of the media to fill up with water to allow the whole thing to get wet.
Farmer Fred:
[13:00] Let’s make Debbie mad. So what would you put in the bottom of that container?
Debbie Flower:
Nothing!
Farmer Fred:
Okay, alright.
Debbie Flower:
[13:09] There is one instance where I would put something in the bottom of the container. And that’s if I got really inspired, I guess, and bought one of those tall containers like this tall. And I’m going to grow something in it. Well, feeder roots are only in the top 30 inches, 36 most of any soil out in the field. Roots that go deeper, everything you learn in horticulture, there are exceptions. So there are exceptions. But if I don’t need, I don’t have the money, the media to fill the container, I can get 30 inches deep, I’ve got enough space to the side for that plant to survive, then I might put something in the bottom. And this I learned from professional interior scapers. So the people who do the pots in the mall and the lawyer’s office and the bank and wherever else. I’m friends with a couple of them. Milk jugs with the lids on in the bottom just to fill up space. That’s the only time if this was a really huge container. And that’s what they’re dealing with. Look at those pots when you go to the mall next time, if you ever do that. You’ll see that those containers are really, really big and really deep in some cases. And so to save money, they use the milk jugs in the bottom.
Farmer Fred:
[14:22] But they’re also swapping out those plants on a regular basis.
Debbie Flower:
[14:25] Yes, seasonally often. Yeah.
Farmer Fred:
[14:27] So when you do it at home, though, you’re creating a whole host of problems if you decide. And heaven’s knows, we’ve heard for years, oh, put some pot shards in the bottom of the container. Put some gravel in the bottom of the container. Put some styrofoam in the bottom of the container.
Debbie Flower:
[14:42] It’ll improve drainage. No. No, no, no, no, no, no, no. No. No, water moves down through the media. I always think of it as music. I don’t know if that works for anybody else. Attached to the sides of the particles and moves down through the texture, whatever texture your media is. When it comes to a drastic change in texture, it stops. And then the water builds up above that. And so the media becomes totally saturated with water. And there’s nothing in the styrofoam peanuts, the rocks, the pot shards, whatever they are below that. Next drop of water you put in will push water from the top down into that lower level, but it doesn’t naturally flow there. It’s very counterintuitive. Engineers don’t even understand it. My husband, a hydrologist, worked with engineers on ponds that were used to dry out the crap that came out of coal-burning smokestacks. And they thought they were doing really, really well because they weren’t getting any moisture in the sand below, the soil below these concrete containers. It wasn’t working. They had a crack in the concrete container. The media was going out and sticking to the concrete container, and so they were actually ultimately polluting the area.
Farmer Fred:
[15:57] I always like to think of flowing water as being on the freeway. There’s no problems. You’re going down highway 80 or 50, at 65 miles an hour. Everything’s fine. And all of a sudden you see taillights ahead and all of a sudden everything’s backing up and you’re down to 20, 30 miles an hour. And you wonder, OK, where’s the accident? What’s going on? Turns out when you pass it, it was just a Tesla on fire on the side of the road. So it was nothing. It was off to the side. It wasn’t blocking the lanes or anything. But people slow down. Water slows down when it sees that Tesla on fire in the bottom of the pot. Which could be styrofoam. By the way, you know those lighter pots that look like really fancy clay pots but are plastic and they can be rather tall? Don’t ever make the mistake of filling that half full of styrofoam and then planting maybe a tree on top because the first 15 mile an hour wind that comes along, the whole thing falls over. So there are a lot of good reasons for not using it.
Debbie Flower:
[16:56] Needs some weight.
Farmer Fred:
[16:57] Yeah. You do that. How about saving seeds?
Debbie Flower:
[17:00] Yeah, I do that all the time.
Farmer Fred:
[17:01] Let me set it up first.
Debbie Flower:
[17:02] I forgot to set it up.
Farmer Fred:
[17:04] How many of you are familiar with Jalapeno Gate? Jalapeno Gate, I think, hit most nurseries in the area (in 2022-23) where the jalapeno plants they were selling turned out not to be possibly jalapeno plants. They were a sweet yellow banana. But even more, and if you’re growing two other sweet peppers, if you’re growing the chocolate beauty or the purple beauty, those could turn out to be jalapenos, which i think is more of a shock to the system than getting a sweet jalapeno, so a lot of people who are responding to jalapeno gate are saying because of the seed industry consolidating and a lot of the seed that is being grown for plants or that you’re getting as a home gardener may be coming out of only four major industries in the entire world, there is a bigger chance for mix-ups in the future. And the way around that is to save your own seed. How do you save your own seed? What seed should you save? What seed should you not save? What seed would not you save?
Debbie Flower:
[18:09] You would not save the seed from a plant that is called a hybrid or an F1. It would say it on the package. If you’re not unsure, then you would Google the name, the cultivar. So it wouldn’t just be Google tomato. It would be Google tomato early girl, which I think is, is not a hybrid. Tasty Lee. That’s one that is a hybrid. You can buy it in your grocery store and I can grow it. It’s not great to grow here. It doesn’t like the heat, but yeah, If I save the seeds from my Tasty Lee tomato, I’m going to get one quarter of the plants I grow from that will look like, taste like Tasty Lee’s. The other three quarters will look like the parents of Tasty Lee. And they’ll have potentially different flavor, different sizes, maybe even different colors. If you want to do it for fun, great. But you don’t know what you’re going to get.
Farmer Fred:
[19:00] However, you could luck out. Because in the case of Early Girl, which was introduced as a hybrid back in the 1950s or 1960s, has pretty much settled down. You could almost call early girl an heirloom at this point, because if as long as that plant has a little bit of isolation and not that much, maybe five, six feet of isolation, you could save the seeds of an early girl, an old, hybrid that has it takes about seven or eight years for a hybrid to settle down if indeed they are using the seed of hybrids that they grew the year before. But when you see the letters F1 next to a seed packet, that means that that is the first generation for that plant, and it’s not going to come back true.
Debbie Flower:
[19:43] Right. Yeah, it’s going to come back as its parents. Another thing to be careful about is if you’re saving your own seed, what parents did that seed have? Tomatoes are pretty much self-pollinating if temperatures are right, which means 86 degrees is the temperature to keep in mind for plants. All plants of all origin, above 86 degrees, all they’re doing is keeping themselves cool. So why did I say that?
Farmer Fred:
[20:11] Because of cross-pollination?
Debbie Flower:
[20:13] Cross-pollination, right. So if they’re above that, above the 86 degrees or so, the tomato isn’t doing much of anything. But if it’s pollinated and nights count, okay, temperatures at night counts, it’s pollinated itself, which means that the boy parts and the girl parts grew at the correct rate to cross each other and touch each other inside the flower and no pollinator was involved, then you’re going to get it true to type. Something like a squash, a melon, very typically, I go out and check mine in the morning, see if they need to be pollinated, and I have found the bees sleeping in the male flowers, okay? Easy bees. If you got the bees in there, then the pollen’s coming from who knows where. And a melon can cross with a pumpkin, can cross with a squash. And what you get, if you save those seeds, what you grow next can be anything.
Farmer Fred:
[21:01] Yeah, we should point out, too, that it won’t affect what you’re growing that year. It’s the seeds you save that’ll come up slightly different. And the curcubit family is a little iffy to be saving those seeds. Right, right.
Debbie Flower:
[21:15] Right. So if you want to produce your own and save your own, then you have to be in control of pollination. So you have to be out there very early in the morning when the flowers first open, kick the bees out. Do the pollination yourself and then bag the fruit so that no other pollen gets in there and changes what the offspring will be. As Fred said, the fruit produced that year will be the fruit of the plant. But the fruit produced by the offspring, the seed in that fruit will produce the next generation, and that’s where you’re going to see the difference.
Farmer Fred:
[21:50] So the seeds you bought this year and planted of zucchini and melons, watermelons, cantaloupes, unless they’ve been affected by jalapeno gate, will not give you something different. It will be what that seed packet said it would be. But as we’ve said before, there’s exceptions to everything.
Debbie Flower:
[22:08] Right. There is in horticulture. All right.
Farmer Fred:
[22:11] All right. So let’s say you’ve saved some seeds of, oh, I don’t know, carrots, maybe?
Debbie Flower:
[22:16] Carrots. Okay. I’ll let my carrot go to flower. I did do that because it’s a good pollinator attractor.
Farmer Fred:
[22:21] Oh, that’s the other thing to mention, too. Yes. Let some of your plants go to flower. Yes. That doesn’t mean they’re bad. That means, actually, you’re in for a world of fun because you’re going to attract beneficial insects to all those flowering onions or flowering herbs that you’ve planted.
Debbie Flower:
[22:34] Carrot, arugula, lettuce, chard.
Farmer Fred:
[22:37] And it’s producing seed.
Debbie Flower:
[22:38] And it’s producing seed, right. So you have to let them dry and then get them out of their flower heads. And that’s mostly irritating the flower and letting things fall out. And then you winnow them. I went to a native seed. Native seed is the brand. Seed production facility in New Mexico once. They would not allow me to take any pictures. It was very simple, though. They’d have a table like this. A container not as deep as this, much shallower, full of the seed detritus from the flower. A fan here, and then they’d sit there and go like this. That’s it. And what would come up is the light parts from the flower, and that would blow away. And what would stay in the container is the seed. So you winnow out the seed. Must be dry. Put it in a container. I save my seeds. I keep trying to cover this up because seeds and plastic in the sun get fried really fast. But these are commercial seeds just in a ziploc bag. I’ve closed each seed packet with a paper clip in the refrigerator and that they want to be cool and dry. The refrigerator is a very dry place. You know, you get, you have that pan underneath it to collect the water that drips out of it. Ziploc bags are not airtight. They allow some air movement, but they keep moisture from getting into the seed pack. They also keep it together, you know, one whole shelf. In the refrigerator as seed packets gets messy. If you put them in Ziploc bags, it’s easier to find them.
Farmer Fred:
[24:05] I’m even lazier when it comes to saving seed. I will wait for the plants to have attracted all the pollinators and beneficials. It is like the onion flower, beautiful flower. And until they start dwindling in numbers, what I will then do is snip off the entire flower into a big paper bag and put all those onion flowers in one paper bag, As long as it’s all the same variety, I know what variety it is. And I’ll just close up that paper bag, put it in a cool spot, usually in my office, as Debbie could attest to, and wait. That’s all. The seed will fall to the bottom of the bag, and then come fall, you can plant those seeds.
Debbie Flower:
[24:46] That’s true. You can also plant the seeds with the flower parts, but your spacing becomes difficult. There are going to be a lot of seeds in one flower head.
Debbie Flower:
[24:54] But if you have a few pieces of the flower with it, it’s not going to hurt anything.
Farmer Fred:
[24:58] Boy, you brought up a scenic bypass for me about cleaning popcorn. I like to grow popcorn. And popcorn is a fun crop to grow. And it turns out most people think popcorn comes in a bag. No, no, there’s a plant called popcorn that you grow, and it’s much tastier than the styrofoam pieces that you buy or get at a theater. There’s heirloom varieties of popcorn that are so tasty and crunchy, you’ll think you’re not eating popcorn. But that is the real popcorn. But it needs to be cleaned first. You husk it off the cob, take the husks off, shell the cob with a little tool that they sell for cleaning popcorn called the little stripper. And I let that fall into something like a kitty litter bag. Usually what I usually use, though, is my wife’s turkey roasting pan and let the kernels fall into that. And then to clean it, because there is all that frass around, is I will put it, again, don’t tell her, in her nylon bag, and the popcorn doesn’t fall out, and you can go outside and shake the bag around and watch all the frass fly away.
Debbie Flower:
[26:06] Similar to the fan idea.
Farmer Fred:
[26:08] Where is the best place to store seeds?
Debbie Flower:
[26:11] Well, it needs to be cool and dry, and for me, the refrigerator is the only secure place. The garage, you know, is cool in winter, but is it dry? And in summer, it’s not cool. In the house, the house stays pretty even-temperatured, but not always so dry. To me, the refrigerator is the easiest to know that I have climate control.
Farmer Fred:
[26:32] I share my living space with seed. It’s just in a cool, dry place. If I’m cool and dry inside, the seed’s going to be happy there, too. Right.
Debbie Flower:
[26:42] The rule of thumb is that you can grow seeds for two years. They’re good for two years. So when you buy seeds in a packet, it’s going to say on it packed for, if you bought them today, for full price at a store, it should say packed for 2023, which means that it’s guaranteed to germinate through December of 2023. So you, in 2024, if you store it correctly, you should be able to get a crop out of it and maybe even 2025. If you’re not sure, you do a germination test. So you take a… I’ve done this with paper towels. Fred uses coffee filters. I didn’t bring one. Okay, this is my paper towel. I lay the seeds, fold it in half.
Farmer Fred:
[27:19] You’re going to make an airplane?
Debbie Flower:
[27:21] Lay the seeds on the fold. I do 10 because it really makes the math easy. Fold it up. Make a cigar. Make a cigar out of it.
Farmer Fred:
[27:31] You’re talented to do that with a microphone in your hand.
Debbie Flower:
[27:33] Yeah, I got skills, man. Thank you. Moisten it, make sure it’s wet all the way through, put a rubber band or something around it and stand it up so the fold is up in the air in a container, a glass container, a mug.
Farmer Fred:
[27:49] Your hospital implement.
Debbie Flower:
[27:51] And cover the top. You want it to stay moist. And then you check it every day. If it says it’s going to germinate in seven days, you know, you could maybe let it go two days. But you want to make sure it does not dry out. A seed that has gotten wet, once it dries, it’s dead. So you do not want it to dry out. That’s why it needs to be covered with plastic and checked daily for moisture. And then you start checking it and you open it up this way. And the beauty of standing it up in the container is the roots are going to grow down. They grow toward gravity. And so you can tell which seed has germinated. And so after the seven days have gone by, you open it up and see how many have germinated. If all 10 germinated, you got 100% germination, go ahead and plant them. And you can use these. You can just cut them apart and plant them in the ground. They’ll be stuck to the paper towel or the coffee filter, but they will still work.
Farmer Fred:
[28:40] I like the way how you point to the woman holding the sign, zero minutes left, and you keep talking. Of course. All right. You’re not a master gardener. Act now.
Debbie Flower:
[28:49] Apologize later.
Farmer Fred:
[28:50] That’s okay.
Debbie Flower:
[28:51] All right.
Farmer Fred:
[28:53] We’re going to finish up with one tip, and that is to get your pepper seeds to germinate quicker. When you start pepper seeds in February or January, you know how long it takes pepper seeds to germinate. It’s like three weeks. That’s a long time. Cut that in half for us.
Debbie Flower:
[29:08] Soak those pepper seeds in hydrogen peroxide for 10 minutes. Hydrogen peroxide is H2O2. It’s water with an extra oxygen. I don’t know the science behind it. I was just frustrated. My students were frustrated. I went to Google and said, how do I fix this? And we’re in school. We can experiment. So we did. And it worked.
Farmer Fred:
[29:32] Ladies and gentlemen, Debbie Flower, America’s favorite retired college horticulture professor!
Debbie Flower:
[29:38] We’re going to clean up and we’ll be at that first tent right there.
Farmer Fred:
I mentioned at the start of this podcast that I have, in the last three years, learned some more tricks about pepper seed germination. Two of those tips are right on the label of the sweet pepper seed packet, sold by Totally Tomatoes. It states: when starting seeds, pre soak seeds for 8 hours prior to sowing to encourage germination. Start with warm water. Rinse soaked seeds and sow immediately. Then, apply consistent bottom heat to main soil temperature at 85 degrees.
Debbie mentioned about the improved time for pepper seed germination by soaking the pepper seeds in hydrogen peroxide for ten minutes before sowing. So, this overnight soaking in warm water mentioned on the pepper seed packet from Totall Tomatoes was something different, and worth a shot.
Trying to keep my inexpensive propagation mats at 85 degrees, though, would take a new investment, because If you buy the propagation mats by themselves, they usually will only provide about an extra ten degrees of warmth, based on the ambient room temperature. And I really didn’t want to incur an extremely high electric bill by keeping the greenhouse heater thermostat at 75 degrees. So, I did a smart thing and I hooked up my propagation mats to a compatible thermostat, that allowed me to set the mat temperature to 85 degrees.
Then, there was the case of the ambient air temperature of the greenhouse, which I would normally set at 50 to 55 degrees. But, it has been drummed into me over the years my professional pepper plant growers that to germinate the pepper seeds quickly, they need heat, heat and heat. So, this winter, I raised the greenhouse heater thermostat to 65 degrees, just for the 2 or 3 weeks that it would take for those pepper seeds to germinate and start to put on their true leaves. And you know, if you have attempted to germinate pepper seeds, it is a process that requires a lot of patience, taking usually well over two weeks, sometimes three weeks, to get full germination.
Well, this past winter, with the added heat from the propagation mat and the greenhouse heater’s higher temperature setting, my pepper seeds started germinating in just six days, with the majority sprouting in 8 to 9 days.
As you know, I am fond of saying “Read and follow all label directions.” One of those directions that is on a wide variety of seed packages, buried in the fine print, including on tomato and pepper seed packages, is “start seeds in sterile starting mix without fertilizer.” The part to stress here is: without fertilizer. Those little seeds pack their own nutrients that allows them to germinate. Adding fertilizer before those seeds are up and growing could burn the starter roots. So, when planting seeds, just add water, not fertilizer.
Adding fertilizer isn’t necessary until the plant has two or three sets of true leaves. Remember, the first set of leaves, the cotyledons, that you see on newly emerged seedlings, arent the true leaves. They are there to grab the light for photosynthesis so the plant can start producing its own limited amount of nutrients to keep growing for a short time. Sort of like that hybrid electric car you might have. The electric motor only will get you a short distance at low speeds before the gas engine has to kick in. So, no fertilizer is necessary when sowing seeds. Add it after they are up and growing. And I know old habits are hard to break, and if you are in the habit of adding fertilizer to the soil before planting, at least make sure that it does not come directly in contact with the seeds themselves. And perhaps lighten up the dosage of that fertilizer at pre-planting time. Remember, plants don’t need heavy amounts of nitrogen, phosphorus and potassium, the three main nutritional ingredients in any fertilizer. Try to choose your fertilizer that has 10% or less of the NPK, represented by the first three numbers on the fertilizer ingredient label. There’s nothing wrong with a 5–1-1 fish emulsion fertilizer. Your cat, too, will thank you.
In today’s newsletter is more information about the next Harvest Day at the Fair Oaks Horticulture Center, on Saturday August 1. It’s an event that’s been going on for 28 years at the Sacramento County Master Gardeners one acre demonstration garden located adjacent to Fair Oaks Park, in Fair Oaks California. It is an excellent day of great gardening information as you stroll through the Fair Oaks Horticulture Center. And its free! Harvest Day, Saturday August 1. More info in today’s newsletter, or just do an internet search for Harvest Day at the Fair Oaks Horticulture Center.
And please become a subscriber to the Beyond the Garden Basics newsletter and podcast. Don’t forget that paid subscribers get an exclusive extra podcast and newsletter each week, and have complete access to the library of over 300 past editions to Beyond the Garden Basics. Thanks for listening, and reading!

Thank you for also listening to the original Garden Basics with Farmer Fred podcast, with over 400 podcast episodes available for your garden listening pleasure. Find it wherever you get your podcasts.
Fred Hoffman is also a University of California Cooperative Extension Master Gardener in Sacramento County. And he’s jazzed about riding his bike(s).