I read an intriguing garden column (many years ago) in the Redding, CA newspaper that suggested one way to get tomatoes to ripen outdoors in Autumn. It said: "A rule of thumb is, in the fall, take off all leaves and stems and all fruit that will not have time to develop before frost. You'll end up with skeletal vines and bare fruit, which is exactly what you want, since now all the plant's energy will go into ripening that fruit."
That might work in the mild climate areas of southern California or south Florida, but here in Northern California (and Redding is in far Northern California), you're asking for a quicker end to tomato season if you do that. November temperatures will typically dip down into the 40's here; in late November, nighttime lows in the 30's are quite likely here. When nighttime temperatures are in the 40's and below, fruit development slows to a crawl and causes other problematic issues. Even here in the milder USDA Zone 9 Sacramento region, harvesting red tomatoes in mid-November is an iffy proposition, at best. The typical Sacramento gardener Thanksgiving trick: harvest the remaining tomatoes the day before. Immediately cut off the damaged, ugly portions. Serve the miniscule, pretty remains to Thursday's dinner guests, chopped and mixed into a salad. "Why yes, we can harvest tomatoes on Thanksgiving!" Please don't ask to see the whole tomatoes, though. You might lose your appetite.
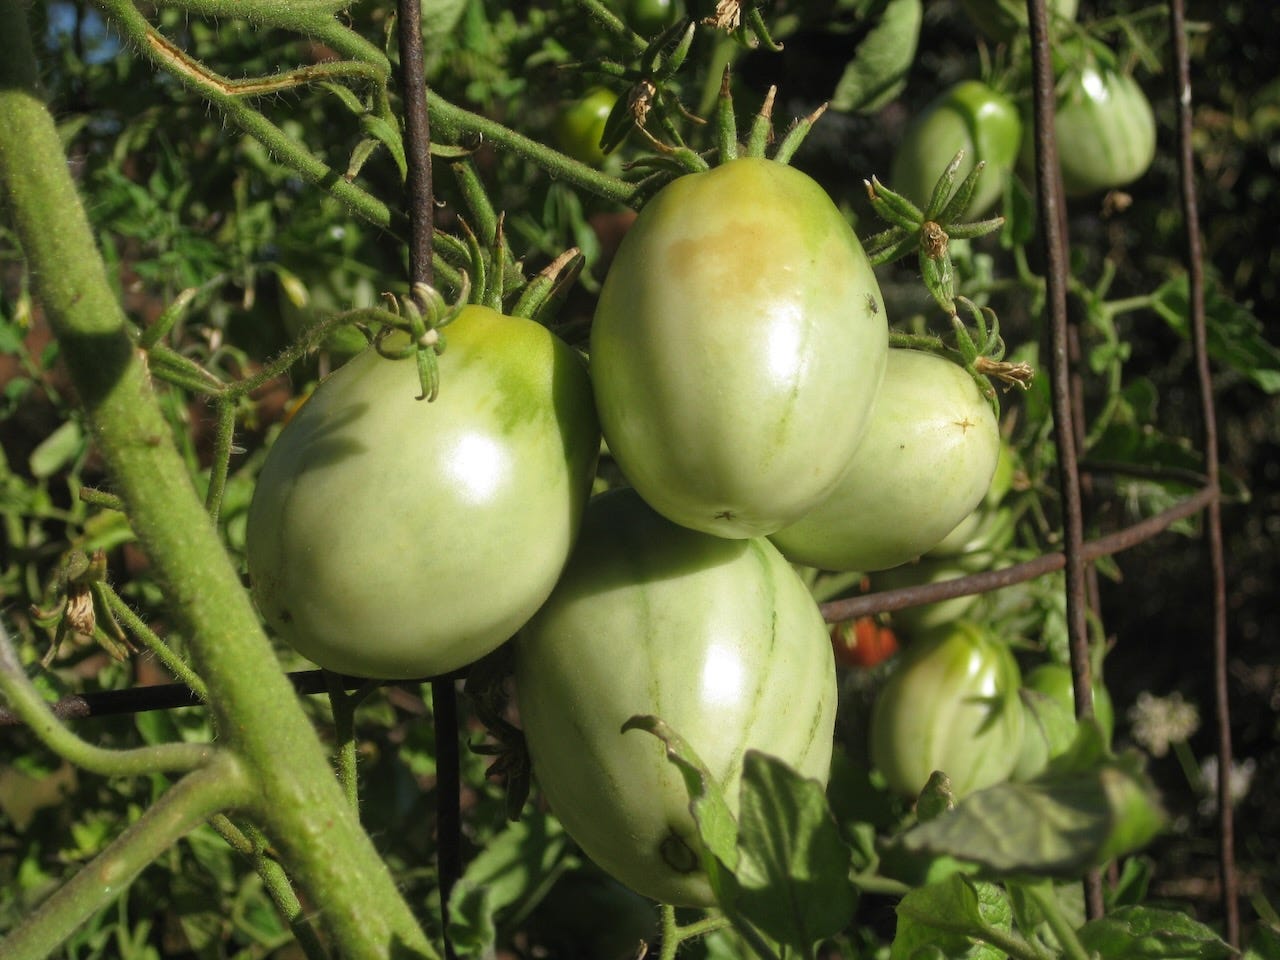
As the fall weather finally begins to turn cooler, gardeners are faced with this annual dilemma: will those green tomatoes in the garden ripen before temperatures start plummeting into the low 30’s? Depending upon where you are located, that question might start occurring to you in September, in the colder regions of the U.S. In many areas of California and other USDA Zone 9 climates, and perhaps parts of Zone 8, fresh garden tomatoes remain edible until late October or early November. They may not be pretty...but they are still a heckuva lot tastier than any tomato you'll find in a grocery store. By mid-November, remaining tomatoes are subject to harsher, colder, wetter weather leading to more outbreaks of blight diseases, insect infestations and bird pecking.
Are you tempted to harvest those green tomatoes, now, hoping they'll ripen up indoors? Here are a few tips.
From the horticulture department at Texas A and M:
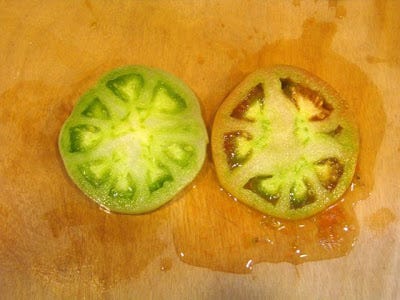
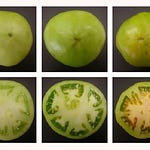
How do you tell when a green tomato, harvested early to prevent freeze damage, will ever turn red and ripen? This can simply be done with a sharp kitchen knife. Harvest a tomato typical of the majority of green tomatoes on your plants. Look at size but pay particular attention to fruit color. Slice through the center of the tomato. Closely examine the seed within the fruit. If the seeds are covered with a clear gel which cause them to move away from the knife, then that fruit will eventually turn red and ripen. If the seeds are cut by the knife then those fruit will never properly ripen. Compare the color and size of the tested fruit when harvesting tomatoes on your plants. Most similar fruit will eventually ripen and turn red.
From Colorado State University:
Cooler September temperatures help fruit to ripen because the red tomato pigments, lycopene and carotene, are not produced above 85 degrees F; nor is lycopene below 50 degrees F.
As late September approaches, gardeners often try to extend the life of their plants by covering with cloth or plastic. Covering plants works well for nearly red tomatoes, but not as well for mature green ones.
Though foliage may sometimes be saved, research shows that chilling injury on green fruit occurs at temperatures of 50 degrees and decay losses rise markedly on fruit exposed to 40 degrees F. Red ones well on their way to ripening tolerate colder temperatures.
Before frost hits and plants go down, pick and bring fruit indoors to ripen. Clip fruit with a very short stem piece left on but one that’s not long enough to punch holes in other tomatoes. Stems ripped out of fruit will open them to decay.
Eliminate (immature) green fruit, as research shows it’s more likely to spoil than ripen and never develops the flavor consumers want anyway. Mature green fruit will develop good flavor. Mature green tomatoes are well sized and have turned light green to white. If cut open, seeds are encased in gel and no empty cavity space is present.
In addition to mature green, sort and store fruit by these groups as they will ripen at similar speeds. Fruit may be "turning" with a tinge of pink color showing, "pink" with 30 to 60 percent color showing, "light red" with 60 to 90 percent color present, and others "fully red" but not soft.
Store mature green tomatoes at 55 to 70 degrees F. Once fruit is fully ripe, it can be stored at 45 to 50 degrees F with a relative humidity of 90 – 95%.
Recommended refrigerator operating temperatures of 40 degrees are certainly too cool to ripen mature green tomatoes and are colder than desired for ripe ones. Ripening enzymes are destroyed by cold temperatures whether in the garden or in a refrigerator.
Ripen tomatoes in well-ventilated, open cardboard boxes at room temperature checking them every few days to eliminate those that may have spoiled. Mature green tomatoes will ripen in 14 days at 70 degrees F and 28 days at 55 degrees F.
The tomato heads at UC Davis recommend storing a small amount of green tomatoes in a carton box on fiber trays or paper layers.
One way to add some air circulation to the bottom, especially in warm conditions: store the tomatoes in a fruit box that contains a perforated plastic liner.
Hobby farmer Linsey Knerl offers these ideas for saving green tomatoes:
Get a rope. By pulling up your plants (root and all, if possible) and hanging them right-side up in a garage or basement, you can prolong their time on the vine for a few more weeks. Just string up some clothesline or heavy rope across one wall, and clip the tops of the plant to the rope with clothespins or binder clips. Try to avoid too much sunlight, or your tomatoes will spoil or ripen unevenly. A temperature of 60-72 degrees is ideal.
Go the paper route. My grandma used this trick to ripen up green ones over a period of a week or two. Pick only the green tomatoes without cracks, holes, or blight, wrap them individually in newspaper, and place them in a single layer in the bottom of a wooden crate or basket.
Save the plant, or take cuttings.
Depending on your latitude, this may require some alternative sources of bright light. For everyone, propagating a tomato cutting or saving the plant can benefit from adding bottom heat by using a propagation mat. Cuttings or plants should be placed in a room or greenhouse where the temperature stays above 50 degrees, ideally between 60 and 70 degrees.
Saving an entire tomato plant takes some forethought. Planting them originally in a container can ease the process. Using a container that lessens the chances of that plant getting overgrown with encircling roots is ideal. Click on the Smart Pots info page about how Smart Pots fabric containers “air-prune” plant roots to keep them from choking your plant. Yes, that is a blatant plug for one of my sponsors…but it works!
When you’re ready to move the plant indoors or to a greenhouse in a sunny location, think about the obstacles that lie ahead (other than lugging a plant indoors). Dig around the soil, looking for ant colonies or insect/tomato worm eggs/pupae. If you find them, I would advise against saving that plant. You may have an ongoing battle with ants, aphids, whiteflies and tomato worms. Indoors! Don’t worry about trying to save any existing tomatoes on the plant. You won’t. That’s a lot of stress on a plant. The existing fruit and flowers will probably fall off or not ripen very quickly. Before your move the tomato plant, cut back the entire plant so that it’s only about 12 inches tall. Thoroughly clean off the remaining leaves and stems with a good blast of water. You may want to invest in a package of yellow sticky traps to monitor for whitefly infestations, especially.
If you are still keen about growing a tomato plant indoors in the winter, read this post from the Farmer Fred Rant blog page that goes into the best varieties to grow indoors during the winter. Oh, and one other thing: the taste of winter-grown tomatoes is just one notch above supermarket quality. It’s nowhere near that delicious, juicy, aromatic tomato that grows in your garden in the summer.
Now that I have discouraged you from lugging insect-laden plants into your home, how about…
How to take tomato cuttings:
1. Using four-inch pots, fill with a dampened, commercial potting soil, preferably a seed starting mix. Your backyard soil is too iffy, because of possible pathogens and poor drainage.
2. Using your finger, a dibble or a round pencil, make a hole in the dampened soil, a few inches deep.
3. Take 5-7 inch-long cuttings from the tips of the tomato plants. Make the cut just below a side branch. Take off any flowers or juvenile fruit as well as the bottom leaves. That cutting only needs the two top leaves.
4. Drop the cuttings into the hole in the soil and gently press the soil around the cuttings, burying at least two of the side branch cuts.
5. For these new cuttings, direct sun should be avoided until you see new growth. Again, bottom heat and a room where the temperatures are at least 50 degrees. Temperatures between 60-70 degrees can speed up the process.
6. Don’t let the soil dry out, but make sure there is a place for the water to drain out from the container. A ribbed, plastic plant tray below the pots is ideal.
7. When you see new growth (in a week or two), you can slowly increase the light. After a couple of weeks, 12 to 14 hours of direct light will help.
8. Transplant into the garden when soil temperatures are above 50 degrees. Using a hot cap or Walls of Water initially after transplanting can help them adapt to their new outdoor home in early spring.
===============
And you can always cook green tomatoes, such as with this recipe for Fried Green Tomatoes from allrecipes.com :
4 large green tomatoes
2 eggs
1/2 cup milk
1 cup all-purpose flour
1/2 cup cornmeal
1/2 cup bread crumbs
2 teaspoons coarse kosher salt
1/4 teaspoon ground black pepper
1 quart vegetable oil for frying
1. Slice tomatoes 1/2 inch thick. Discard the ends.
2. Whisk eggs and milk together in a medium-size bowl. Scoop flour onto a plate. Mix cornmeal, bread crumbs and salt and pepper on another plate. Dip tomatoes into flour to coat. Then dip the tomatoes into milk and egg mixture. Dredge in breadcrumbs to completely coat.
3. In a large skillet, pour vegetable oil (enough so that there is 1/2 inch of oil in the pan) and heat over a medium heat. Place tomatoes into the frying pan in batches of 4 or 5, depending on the size of your skillet. Do not crowd the tomatoes, they should not touch each other. When the tomatoes are browned, flip and fry them on the other side. Drain them on paper towels.
FOR A HEALTHIER ALTERNATIVE...(and you knew this was coming) try this vegan green tomato recipe from the Fat Free Vegan Kitchen Blog:
Oven-Fried Green Tomatoes
Ingredients
1/2 cup water
1 1/2 teaspoon ground flax seed
1/2 cup cornmeal
1/4 cup quinoa flour (or other flour)
1 teaspoon cornstarch (or other starch)
1/2 teaspoon black pepper freshly ground
1/2 teaspoon salt
4 large green tomatoes
Instructions
Preheat oven to 425. Spray a baking sheet lightly with canola oil or non-stick spray or line with parchment paper.
Combine the water and ground flax seeds in a blender and blend at high speed for 30 seconds. Pour into a wide, shallow bowl and allow to sit for a few minutes to thicken slightly.
In another wide bowl or plate, combine remaining ingredients (except tomatoes). Cut tomatoes into slices about 1/4 to 1/2-inch thick. Submerge a tomato slice in the flax-water, allow excess to drip off, and place slice into cornmeal mixture. Press lightly to make sure that bottom of slice is covered with cornmeal and turn to coat other side. Place on prepared baking sheet.
When all tomato slices are coated, bake for 15 minutes, or until bottoms are golden brown. Turn and bake another 15 minutes to brown other side. Remove from oven and serve immediately.
Preparation time: 25 minute(s) | Cooking time: 30 minute(s)
Number of servings (yield): 6
Nutrition (per serving): 94 calories, 12 calories from fat, 1.4g total fat, 0mg cholesterol, 214.6mg sodium, 287.3mg potassium, 18.7g carbohydrates, 2.8g fiber, 5.1g sugar, 3.2g protein.
=======================================
Publication of the “Beyond the Garden Basics” newsletter will be taking a break for awhile. Thanks for reading…and listening.
=====================================
Thank you for also listening to the Garden Basics with Farmer Fred podcast! It’s available wherever you get your podcasts. Please share it with your garden friends.
Fred Hoffman is also a University of California Cooperative Extension Master Gardener in Sacramento County. And he likes to ride his bike(s).








Share this post