Healthier Roots = More Productive Plants. Soil Moisture Meter Tips.
A deep dive into more details about what was discussed in Ep. 156 of the Garden Basics with Farmer Fred podcast.
Grow a lot of plants outdoors in pots? The container you choose can make a big difference.
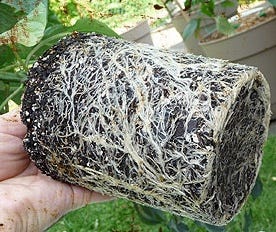
Long-time listeners to the Garden Basics with Farmer Fred podcast know that I am very fond of rather unsexy aspects of growing plants: using lots of mulch; improving the health of the soil; and, producing plant roots that look like this:
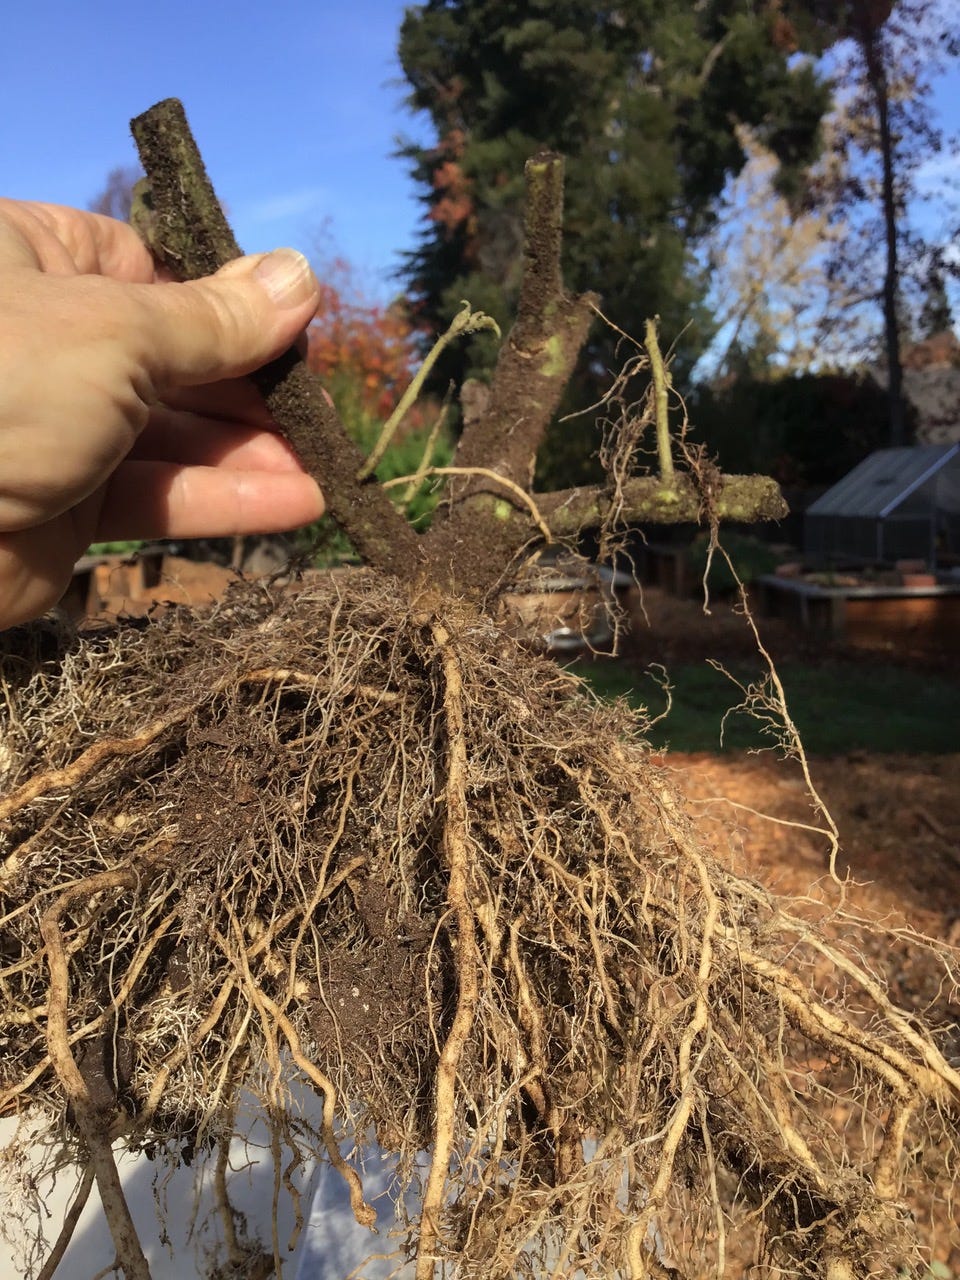
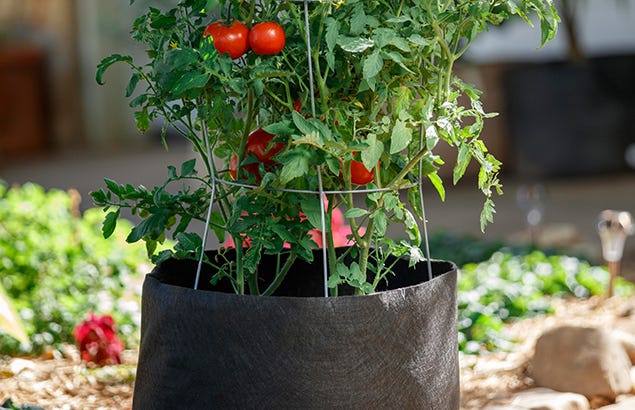
That is the root system for a recently extricated Gardener’s Delight tomato plant, that had spent the spring, summer and fall growing in a 15-gallon fabric container, the Smart Pot. Note the lack of circling roots, girdling roots, and there’s no mass of roots covering the entire bottom, a problem that occurs when you use a plastic or ceramic pot. A rootball that has spent too much time in a plastic or ceramic pot might look something like this:
All that root mass works against a plant struggling to produce vegetables. Water is redirected away from the tips of the roots, where the plant absorbs the water; fertilizer has a hard time reaching those feeder roots, as well, because the root mass is so thick. Oh, and the soil becomes more compacted, destroying air pockets, which are necessary for good plant growth. But having grown that tomato in a Smart Pot, the Gardener’s Delight tomato plant turned out to be one of my most productive tomato plants in 2021, producing tomatoes from June through early December.
What is it about the Smart Pot that keeps the roots from going round and round? We talked with Smart Pots president, Kurt Reiger, about that on Episode 156. He says,
“Roots are apically dominated, meaning the root grows at the tip of the root. The root growth is at the tip, or the apex of the root, and as moisture and nutrients travel, they are absorbed by that root tip and then travel up the root structure. And so those feeder roots at the tips of the roots are what you want, you want as much of that as you can get. And that's what absorbs moisture; nutrients are also absorbed by that. But in a plastic or a ceramic pot, the root tip grows and it hits that plastic, and it starts to circle around and around. And pretty soon the travel distance for moisture and nutrients gets longer and longer because of the circling of the root structure. In a Smart Pot, the root tip hits the side of the fabric, it's engaged in that side of the fabric, kind of caught in the side of the fabric, and it air-root prunes, meaning that it kind of dries a little bit and it stops. And that signals the root to branch or fill out, so you have a root pruning and root enhancement. And you literally double or even triple the size of the root structure and most importantly, you double and triple the amount of fibrous feeder roots in the root structure. So, instead of a root circling around 100 times, you have 100 different branching or fibering of the root structure, which allows you to uptake a lot more moisture and nutrients into the plant. And if you have a better root structure, you're going to have more fruit. More roots means more fruit.”

At this point, you might be thinking: “Ooh, nice infomercial, Fred, for one of your sponsors.”
Yes, Smart Pots is a sponsor of the Garden Basics with Farmer Fred podcast and newsletter. And yes, Smart Pots work as advertised! However, let me say this about the sponsors on my podcast and newsletter: they wouldn’t be a sponsor unless, a) I like the product; b) I use the product; and, c) I would buy the product again. That is also true for my other advertisers, such as wholesale plant grower Dave Wilson Nursery.
I get approached by many garden-related companies that want to advertise on the podcast; most get rejected because I either: a) don’t like what they’re selling; b) Hell if I would ever use that in my garden; or, c) I’m not wasting my money on that again!
How do Soil Moisture Meters Work?
My ears perked up when Debbie Flower, our favorite retired horticulture professor (I love her brain!), said this on Episode 156 about using soil moisture meters to determine when to water your plants:
“You can use a moisture meter if you know how to use it. Moisture meters, what they're really measuring is electrical conductivity in the soil. So the type of soil and the amount of fertilizer in the soil will change the readings and so what you need to do is to learn how to use it. Stick it in the soil when you know it's dry and see where it reads. And then water the soil, let it drain so it's going to take maybe an hour or two. Stick it in the soil again, and you're only going down to the root zone. They have maybe 10 inch, two foot long shanks on them. You don't need to go that deep, maybe only halfway. And see where it reads when it is completely wet. Depending on your soil type and how much fertilizer you've used, that needle will be in various places. So you may want to mark the shank with a marker or something. And then you can check your soil. When it gets to the low spot (on the meter), then you know it's time to water.”
Whoa….fertilized soil can give you a false moisture reading? How so, Debbie? Does the type of fertilizer (synthetic vs organic) make a difference? She explained in a follow-up email:
“I don't believe the type of fertilizer changes a soil moisture reading. It is just fertilizer salts, in general. Fertilizers in the root zone must be in the salt form so that they can dissolve in water and move to plant roots.
Higher amounts of fertilizer lead to salt build-up in the root zone. Then we see damage to plant parts above ground and crystal formations on ceramic pots. If salt levels get too high in soil media, the direction of moisture movement reverses, meaning liquid will ooze out of the roots into the media to equalize the salt content on both sides of the cell wall.
So, all fertilizers that provide nutrients to plants are in the salt form. Electric currents need salts to travel (this part I can't explain. I just accept it as fact). Soil moisture meters use electric currents to measure moisture in the media. Greater salt content in the media shows as more moisture in the media.
If you put a soil moisture meter in distilled water it will read dry. I have done this!
To measure the moisture after fertilization: Calibrate the meter first. To calibrate my moisture meter readings I would measure and record data right after application of the fertilizer, and again right before, and right after, each irrigation. I think that would give me enough data to understand what reading I would get from the moisture meter when media is wet and when it is dry. This is the only publication I could find that at all addresses the topic of “Portable Soil Moisture Meters”, and it is very general.”
The good news in that publication? The inexpensive soil moisture meters available at nurseries and garden centers do a good job of giving accurate soil moisture readings. The bad news: they have a limited lifespan. It took a bit of sleuthing to find the author of that unsigned Ventura County Cooperative Extension publication on moisture meters. Turns out, one of the co-authors is long-time Ventura County Farm Advisor Jim Downer (he also is a big fan of mulch!). Here is a link to his original publication about moisture meters. This study of homeowner-friendly soil moisture meters agreed with Debbie Flower’s assessment about the effect of salts in the soil on the meter readings: “Soil salinity could also pose a problem because meters could be read artifi-cially “wet” by salt presence.” The name of the study is “Portable Soil Moisture Meters”, from the publication, “HortTechnology”. Hold your breath: this is a deep dive…
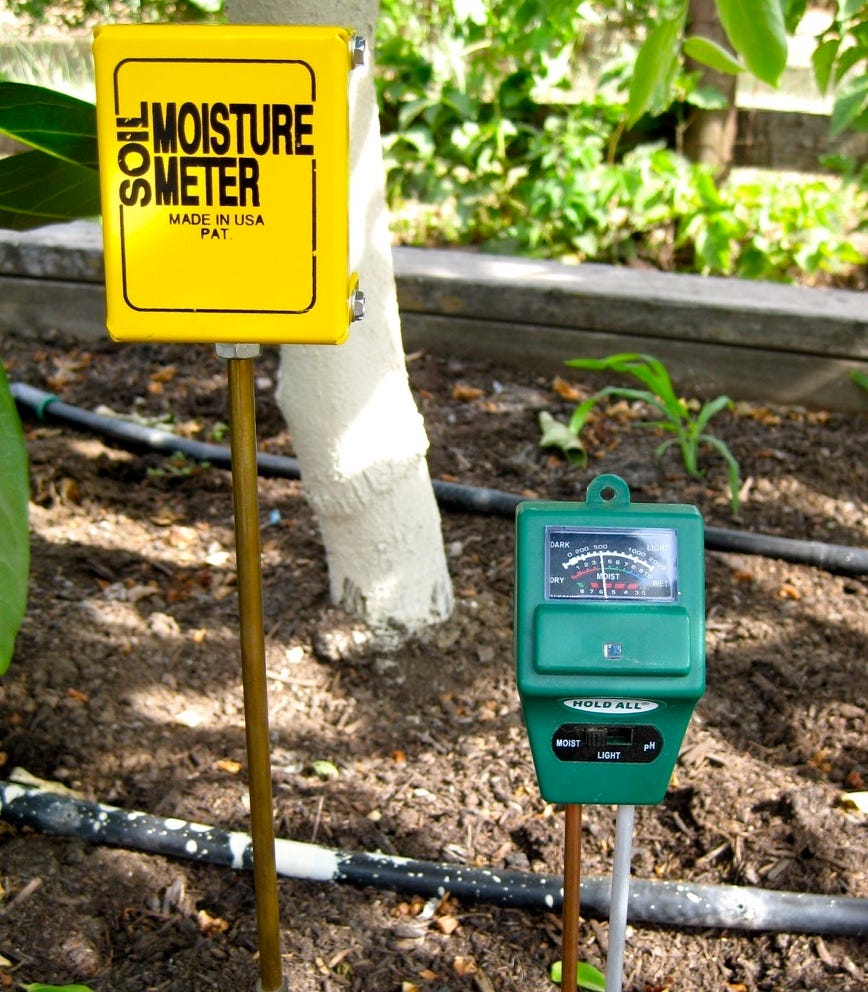
p.s. In that picture above of the moisture meters… I really like, and use regularly, that larger yellow soil moisture meter on the left. I have had it for over 15 years. I would buy it again. In that podcast segment with Debbie Flower, she also mentioned using a long-shanked screwdriver to determine soil moisture:
“When I was teaching at the Skill Center, which is a vocational high school in the Sacramento City School District, my students maintained a landscape which included lawn and ornamental plants, as well. They established a vegetable garden. And when I was grading them, I would take a very long shanked screwdriver, it was probably eight to 10 inches long. I was checking that they were irrigating deep enough. And so I wanted to make sure that the shank went down at least six inches, I want that water at least six inches deep. When you hit dry soil, the screwdriver stops. Soil will typically dry from the top down. But if it's still moist at the bottom, you don't need to irrigate. There are roots down there; they're doing just fine. So you can take a long shanked screwdriver and put it in the soil and if it doesn't go in, then you know it's too dry”
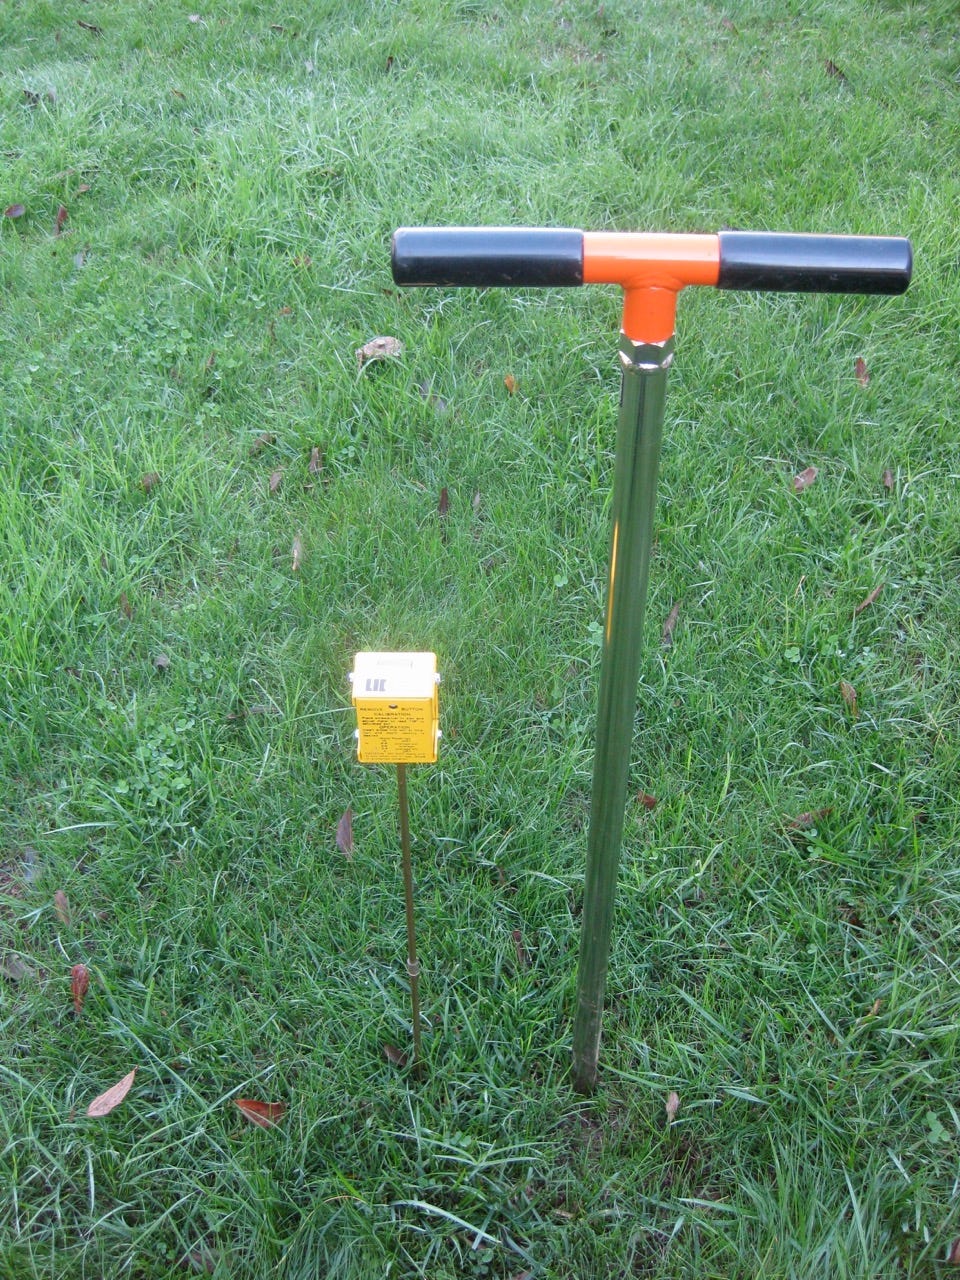
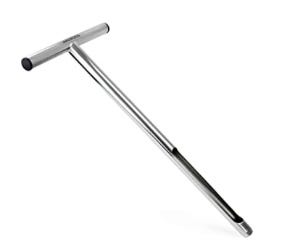
Another option is a soil probe.
This is a tool that can last a lifetime. It consists of a long, hollow metal tube, with an opening along the side, as well as a sturdy handle for plunging it into the soil to root depth (8-12 inches) and giving it a 90-degree turn. Lift it out, and feel the soil in the opening along the side.
Is it moist or dry? Do the “plunge, twist and lift” maneuver in several places around the “drip zone” of the plant, where the feeder roots are located, beneath (and beyond) the outer canopy of the plant.
Thanks for Subscribing and Spreading the Word About the Garden Basics with Farmer Fred newsletter and podcast, I appreciate your support.
As an Amazon Associate, I earn from qualifying purchases from some of the underlined links in the newsletter. This is how I am trying to keep this a free newsletter. And as long as you buy whatever you want from Amazon using any of those links to get into the Amazon site, I get a few pennies. Thank you.
And thank you for listening to the free, Garden Basics with Farmer Fred podcast. It’s available wherever you get your podcasts. Please share it with your garden friends.
Fred Hoffman is also a University of California Cooperative Extension Master Gardener based in Sacramento County, California.


