
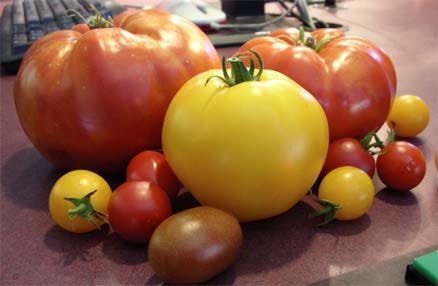
Today’s newsletter has tips for how to harvest seeds from homegrown tomatoes for planting next year…with a lot of warnings.
In today’s podcast, Debbie Flower and I go over the basics about how to determine if your saved tomato seeds will germinate, and how to get the best results when it comes to starting those tomato seeds the following year. Among the advice:
• Tomato seeds stay good for about two years if stored cool and dry. Debbie keeps hers in the fridge in a Ziploc bag, never the freezer.
• Save the original seed packet along with the seeds. Group packets by season (early spring vs late summer) and type (edible vs ornamental) so you can grab what you need when it’s time to plant.
• Test old seeds before you rely on them. Use 10 seeds on a damp paper towel, roll it up like a cigar, stand it in a cup inside a Ziploc bag, and check for germination in 7 to 10 days.
• Plant seeds at a depth of about two to three times their narrowest dimension. For tomato seeds that works out to roughly a quarter inch of moist seed starting mix on top.
• Moisten your seed starting mix before you fill containers and before you cover the seed. Dry mix is hard to wet evenly once it’s packed in, and roots won’t grow into dry pockets.
• Damping off is the biggest early threat. It’s a fungus that kills seedlings right after they sprout, before they get true leaves. Guard against it with clean containers (a 10% bleach soak works) and fresh media that’s never been reused for seed starting.
• Bottom heat, around 70 to 75 degrees, gives faster and more even germination. A proper seedling heat mat makes a real difference over no heat at all.
• Wait until the first true leaves appear before transplanting seedlings into their own pots. Root damage is less likely at that stage than if you wait longer.
• Moving young plants up to a bigger pot, like a one gallon container, a few weeks before planting out, can produce a healthier plant, though it won’t necessarily get you tomatoes any sooner.
• Don’t rush the garden. Wait until nights are reliably above 50 to 55 degrees and soil is above 55 to 60 degrees before transplanting outside.
• When you do transplant, bury the stem deep, in a trench if the plant is tall. Roots will grow along the buried stem, and you don’t need to point the roots down or strip the leaves. Gravity handles the rest.
• Pruning suckers is optional. Research, including from Cornell, shows it doesn’t boost yield, and in hot climates stripping too much foliage can leave fruit sunburned.
• Your growing season length should guide your variety choice. Cherry tomatoes can mature in as few as 55 days, so even a short season can work if you pick the right type.
• Some newer varieties are parthenocarpic, meaning they set fruit without pollination. That’s a real advantage in cloudy climates.
• Green tomatoes picked late in the season can still ripen indoors. Lay them in a single layer somewhere cool with space between each one, since they’re still alive and touching fruit invites rot.
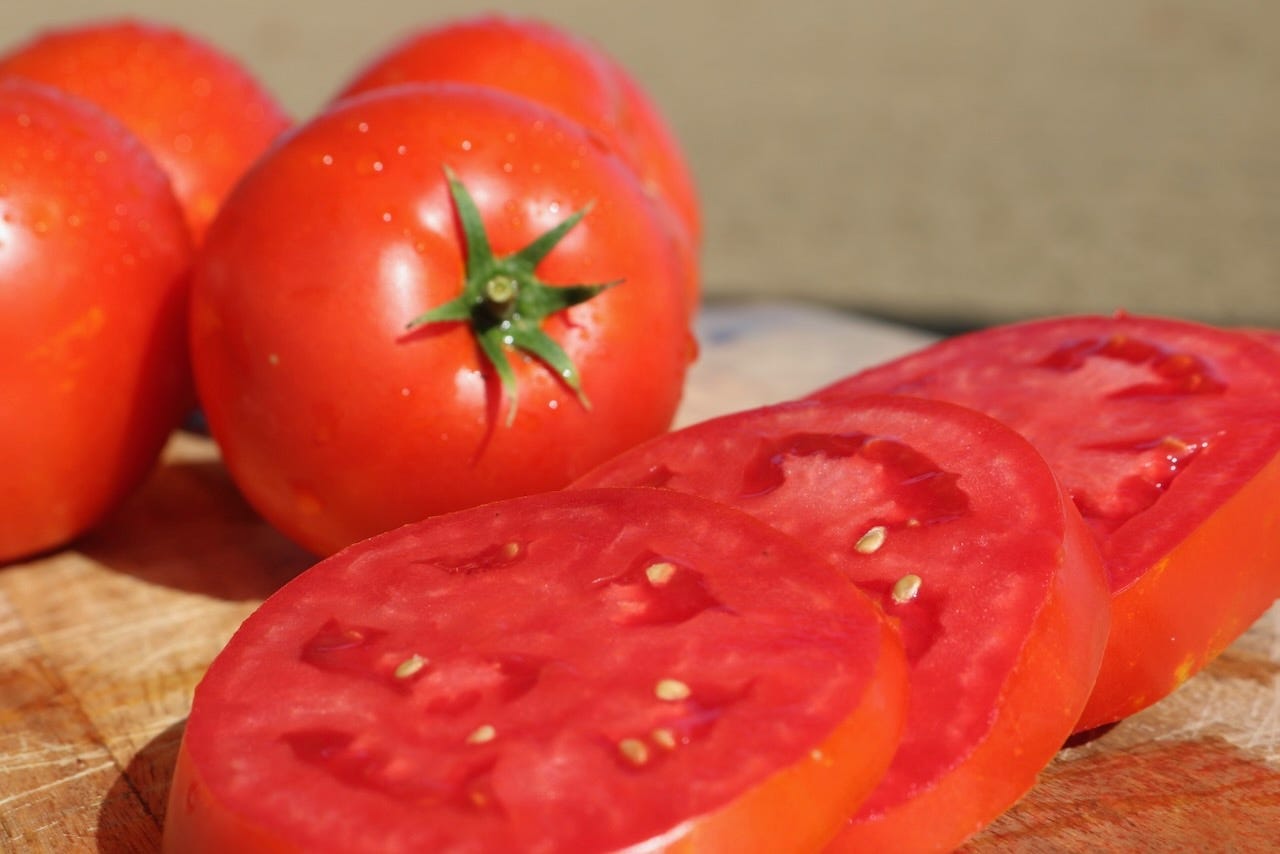
Collecting, Storing and Using Home-Saved Tomato Seeds
If you want to save seeds of a particular tomato variety, remember that many varieties are hybrids; they may not necessarily come back with the same traits as the tomato you enjoyed last season. According to Penn State Extension, the result of these crosses usually only lasts one generation, so the seeds harvested from hybrids may produce disappointing results.
Or, may not be a disappointment. Tomato flowers are primarily wind-pollinated. So, those plants grown in isolation or covered with insect netting during their flowering period may provide satisfactory results.
According to tomato breeder Brad Gates of Wild Boar Farms:

“This mind blowing specimen appeared on one plant last season. We collected seeds and grew out 24 plants this year to give it an evaluation. All plants gave the same results both in plant habitat and fruit. If you have a tomato plant that gives unusual fruits, is extremely vigorous or disease tolerant be sure to save some seeds.”
Experiment! One tip: note the tastiest varieties in your garden right now, in September. Save those seeds. Then, next year, plant those seeds and see if it replicates what you enjoyed this year. Giving that plant a bit of isolation from other tomato varieties - either by distance or netting while it is in flower - can help in its self-pollination (plus a gentle shake of the plant in mid-morning when it is in full flower).
Open pollinated or heirloom tomato seeds are fine for saving, and will come back true… especially, as already mentioned, if they’re grown in isolation or protection.
For best results when harvesting tomatoes for this experiment: save the seeds from tomatoes that are overly ripe; rinse off as much of the flesh and protective gelatinous coating from the seeds as is possible. Then, soak the seeds in a jar of water for a couple of days to remove the rest of the coating. The seeds will sink to the bottom, the gel will float. Discard the gel, remove the seeds and let dry on a paper towel. Then, store in an airtight container in a cool, dry location.
Tomato seed saving techniques can vary. Here’s a sampling of methods from across the country.
From Penn State:
Tomato seeds should be harvested when the fruit is ripe enough to eat. Tomato seeds must be fermented to separate them from the gelatinous pulp that surrounds them. To do so, cut the tomatoes and squeeze the seeds and pulp into a jar. Let the jar sit for two to three days, agitating it occasionally. The viable seeds will sink to the bottom of the jar. Decant these seeds by pouring out floating seeds and liquid from the top of the jar. Fill with fresh water and repeat. Then, pour the viable seeds from the bottom of the jar onto a cheesecloth or a fine sieve to dry.
Seeds should be dried to the point where they could be snapped by hand or shattered with a hammer. Another test for proper dryness is to make sure that you cannot dent the seed with your fingernail. Gardeners spread seeds on various materials to dry them, including newspapers, coffee filters, paper plates, and screens. Storage preferences vary, too. As long as seeds are kept in cool, dry, dark place, they can be stored in plastic or glassine bags, plastic containers, or glass jars. Some seed savers have good luck with storing seeds in the refrigerator; others feel that this environment could contain too much moisture, causing the seeds to mold. You might want to experiment to find the storage location that works best for you. No matter how they are stored, seed containers should be labeled with details about the plant variety and date. Many seeds are viable for only a few years, which makes the date of harvest very important.
Advice from Fresno County (CA) Master Gardener Jeannette Warnert:
First - Select your tomatoes.
Make sure they are ripe and healthy.
Avoid hybrid tomatoes since they are intentionally mixed and your new tomatoes will not be identical to the parent.
Pick several tomatoes of each variety you would like to save. While one tomato has plenty of seeds, it is good to get a mix of seeds to maintain good genetic diversity.
Next - Cut the tomato across the middle.
Gently squeeze or scoop out the seeds and gel into a clean glass jar or bowl.
Add a little water
Don’t forget label the jar with the tomato variety.
Cover loosely with a lid or paper towel and let it sit at room temperature for 2 to 4 days.
Stir once daily and change the water once or twice.

You may notice bubbling, a slight smell, and a layer of mold forming — that’s normal! After a few days rinse and repeat until any mold is removed from the seeds and the water is clear.
Each tomato seed is surrounded by a gel sac that contains growth inhibitors. This must be removed for good germination. Do your best to remove the gel around the seeds. This will be your biggest challenge.
Once you feel that the seeds are clean, pour off the water. Seeds that are floating on top of the water are not good and should be discarded. The good seeds will sink to the bottom.
Spread the seeds on a paper plate. Do not use a paper towel as the seeds will stick. Stir them to prevent clumping and to speed up the drying process. When the seeds are completely dry store them in a labeled paper envelope in a dry cool place.
Tomato Seed Saving Advice from the Chicago Botanic Garden:
Waiting for the Ripe Time
The gel that surrounds the tomato seed contains chemicals that prevent seed germination. This may seem counterintuitive, but many seeds come equipped with mechanisms that stall germination until the time is right. Without the inhibitors in the gel sack, nothing would prevent a tomato seed from germinating within the fruit while it is still on the parent plant. When a ripe tomato falls off the plant, it sits on the ground and rots away, gel sack and all, and the seeds are left to germinate.
Home Grown Germination
You can replicate this rotting process at home. Cut open a very ripe tomato and squeeze the seeds into a tall jar. Stir the seeds once a day for three to five days. A fungus will form, ferment, bubble and smell absolutely awful (you’ll want to keep the jar outside). This fermentation process will kill many seed-borne diseases.
After three to five days, add some fresh water to the jar and shake it vigorously. Conveniently, the fungus and unviable seeds will float to the top, while the good seeds will settle to the bottom of the jar. Pour off the fungus and the water, rinse your seeds and allow them to drip dry. Spread the seeds on a glass or ceramic pan and allow them to dry out completely.
There is an alternate method. Put the seeds with a little bit of water in a sieve and run cool water over them. Swish them around to allow the gel to run out of the sieve. You won’t get all of the gel off, but a thorough rinsing should be sufficient. Let the seeds drip dry, then spread them on a paper towel to finish drying out. The seeds will stick to the paper, but it can be easily rolled up to store the seeds in a paper bag.
Storing Seeds
When your seeds are dry, store them in a cool (not cold), dry place away from pests. Be sure to label your seeds with the name of the variety and the date that you saved them. Tomato seeds may remain viable for up to four years, but if you’re saving them through the summer, make sure their storage area remains cool and dry, even on hot days.
Don’t save seeds from the fruits of hybrid plants unless you have the time and the space for experimentation. F1 hybrid seeds are produced by crossing two genetically different, and usually very inbred, parent plants. Seeds saved from the fruits of hybrid plants generally revert to the undesirable parent varieties — that is, if they germinate at all. Standard, or non-hybrid seeds, will produce plants like their parents, as long as they have not been allowed to cross with similar varieties of the same species. (With tomatoes, the chances of such outcrossing are minimal.)
From the Brooklyn Botanic Garden:
Your favorite open-pollinated varieties can all be harvested for seed collection so they can be planted and grown again next year. All heirloom tomatoes are open-pollinated and are said to “come true.” This means future plants grown from saved seeds will be like the parent plant. Avoid hybrid tomatoes since they are intentional crosses and will not come true.
When you are ready to collect your seeds, choose your very best fruits—those that are healthy, disease-free and ripe to overripe so the seeds inside will be fully developed.
Step 1: Cut and Collect
Using a serrated knife, slice the tomato in half width-wise through the center, along the equator.
Observe the seeds. Some will be fully formed and some tiny. You might notice that the seeds have a gel cap around them. The gel gives tomatoes that delicious “tomato” taste and also inhibits the seeds from sprouting inside the tomato.
Squeeze half of the tomato so the seeds and gel fall into the jar. Repeat with the other half and more tomatoes of the same variety if desired.
Step 2: Soak and Ferment
Pour ½ cup of water into the jar; add lid and shake well. If saving lots of seeds, you can use more water and a bigger jar. Use ½ cup of water for every 2 tablespoons of tomato seed pulp.
Put the jar in a warm, not hot, place to ferment for a week. (Room temperature is fine.) The fermentation will dissolve the gel cap, which is important for saving tomato seeds. If not fermented, the seeds might rot during the drying process from too much moisture.
You might notice bubbles and mold on the top of the water. This is normal, and indicates fermentation is happening! After a week, carefully pour off the mold and pulp pieces, and most of the water; be sure the seeds stay in the jar.
Rinse seeds several times. Add water to the jar; shake. Let it rest so viable seeds fall to bottom. (Seeds that are not viable will float.) Then pour off water and any gel or plant fragments. After the last rinse, you’ll have clean seeds with no gel cap.
Step 3: Dry
Transfer clean seeds to a coffee filter, paper plate, or small paper bag to dry. (Paper towels tend to stick to the seeds.) Remember to label your seeds. Once totally dry, about a week later, put seeds in a clean dry jar or envelope. Or make your own custom envelope.
Step 4: Store
Seeds should be kept in a cool dry area out of direct sunlight. They can be viable for 3 to 10 years, sometimes longer. Consider writing the variety, date, and source of the tomato and any other special notes, like “heavy producer” or “ripens early.” Once stored, you’ll be all set to start your tomatoes inside in early spring!
Tomato Seed Planting Tips
Start seeds early. January and February are the best months for starting tomato seeds; March in colder climates. This will allow 8-12 weeks for the plant to get off to a good start in a warm, sunny place, such as a south or west facing window. It usually takes 7-14 days to germinate tomato seeds. To test for viable seed that you’ve been saving: moisten a coffee filter, and place a few seeds in the filter, with space between the seeds. Place the filter in an old yogurt container, cover it, and place in an area out of direct heat. Check every few days to see if seeds have sprouted.
Give seeds a healthy start. Use a light, quick-draining potting mix. Commercial seed-starting potting mixes are available; or, mix your own, using 4 parts compost, 2 parts peat moss, and 1 part each of vermiculite and perlite. Any small container with drainage is OK for starting tomato seeds. Fill containers about 3/4 to the top with the potting mix. Water, let drain. Plant seeds shallow, no deeper than 1/4 of an inch. To hasten germination, use a heating pad designed for seeds, such as a propagation mat. This will warm the soil to 70-75 degrees, which tomatoes need to germinate. Keep the soil mix moist. To prevent emerging seedlings from bending too much toward the sunny window, rotate the pots a quarter turn each day. If you are using grow lights, position the seedlings about 6 inches from the light source; keep the lights on 15-18 hours a day.
Movin’ on up. When two or three sets of true leaves develop on the tomato seedling, you can transplant it to a bigger pot. This is especially helpful if you started your seeds in a flat or in a small peat pot, or the young stems are bending toward the light at a sharp angle. When transplanting to a bigger pot (preferably a 4-6 inch pot, but no larger than a one gallon container), prepare the new pot the same as before. However, don’t fill the pot as full. Place the tomato seedling, with as much of the original soil as possible to avoid disturbing the roots, into a 1/3 to 1/2 filled pot. Then, add moistened soil mix all along the stem, up to the bottom set of leaves. If you are growing tomato seedlings in a flat, thin them out so that there are six inches between plants. This will lessen the chance of root entanglement and damping off, a fungus disease that kills young seedlings.
Timing is everything. Acclimate any indoor-grown tomato seedlings slowly to their new outdoor home; this lessens the shock to the plant, allowing it to grow at a quicker pace. About 10 days before setting out into its permanent garden home, place out during the day in a shady or semi-shady location; bring plants in at night.
Mid-Spring is Tomato Planting Time. Plant tomato transplants when the soil has warmed enough to keep the plant actively growing. Around here in USDA Zone 9, mid to late April or early May is the optimum time to set tomato plants outdoors, unprotected, in a garden area that gets full sun. If you can’t wait that long, protect those tender young plants with hot caps, row covers or “Walls of Water” - plastic, cone shaped enclosures that are filled with water which collect heat during the day, slowly releasing it at night.
Plant deeply. Place the tomato deep into the soil, clipping off the lower leaves and leaving only the top leaves and branches exposed. This will cause more roots to develop along the stem, speeding development.
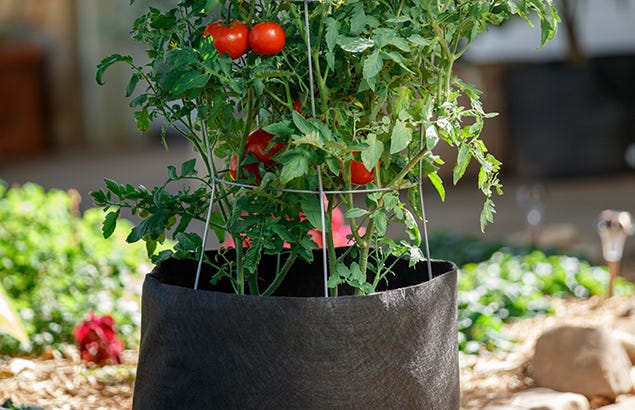
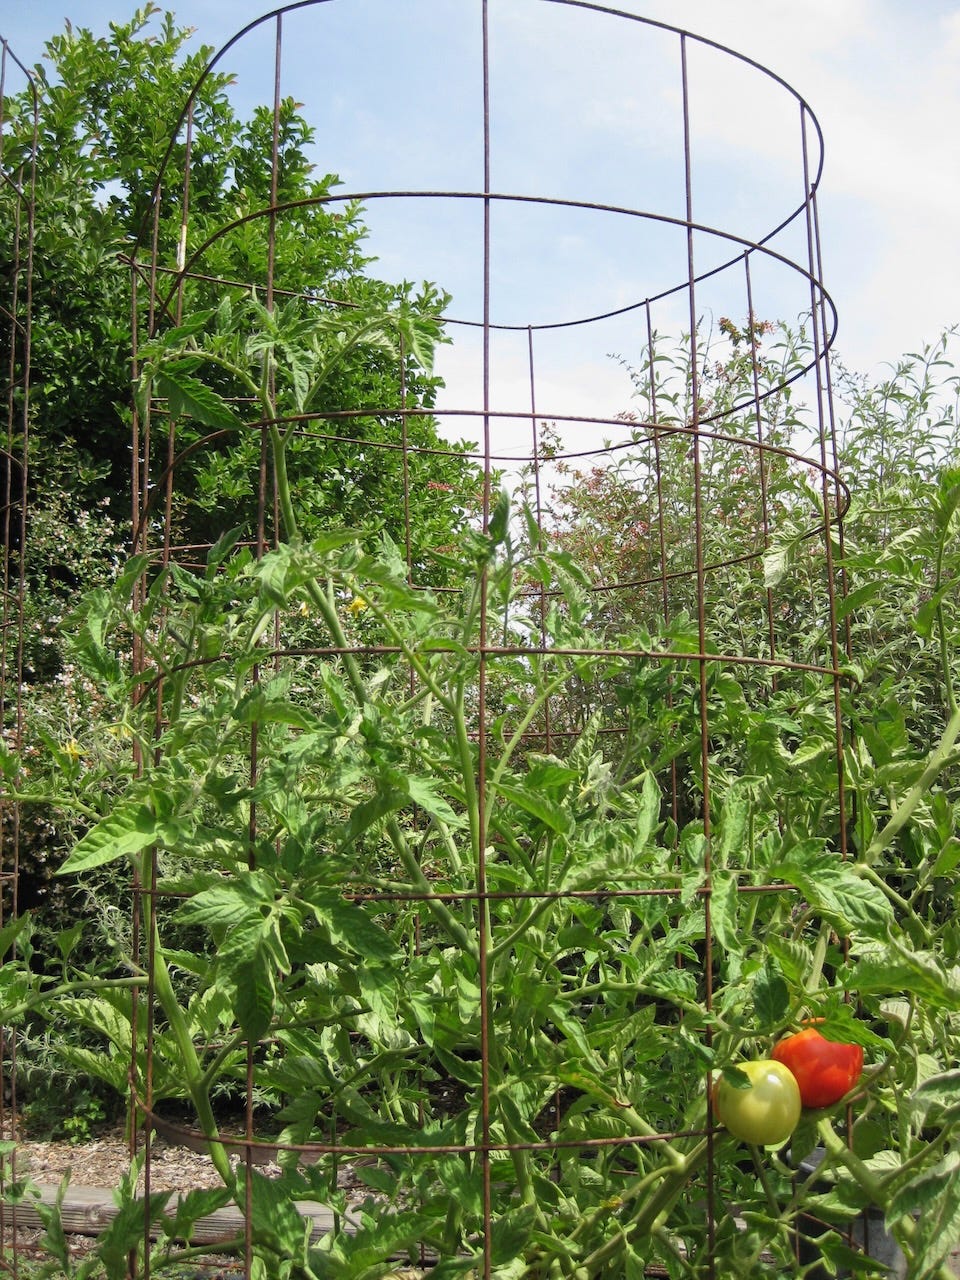
Stake, stake, stake. Supported tomato plants produce more fruit and are subject to fewer problems. One of the best tomato support systems that can be used repeatedly for a number of years include “cages” made from concrete reinforcement wire. A 50-foot roll of this six-inch mesh, five feet-high wire can be cut to make about a half dozen tomato cages, each with a diameter of two to three feet. The six inch mesh allows for easy access at picking time. Stake and tie the cages to the ground, with one stake on either side of the cage.
Water carefully. Tomato plants like water on a regular basis, deeply, once or twice a week, depending on the consistency of your soil. Soaker hoses or drip irrigation work best. Regularly scheduled deep watering reduces plant stress, one of the causes for that mushy, black or brown discoloration on the bottom of tomatoes, called blossom end rot.
Fertilize regularly, but sparingly. Feed the plants using a fertilizer that lists tomatoes or vegetables on the label. Follow the label directions; do not overfeed.
Pick, pick, pick. Don’t let the fruit overripe on the vine; pick when fully firm and red. Hand picking is also the most potent control for mature tomato worms. If using chemical products, make sure the label states that hornworms are controlled by the product. Also available for hornworm control: a bacterial insecticide containing Bacillus thuringiensis (Bt). If you spot a tomato horn worm with a patch of white on its back, let it be. Those patches of white are the eggs of the parasitic trichogramma wasp that eventually will do the dirty work, eating away at the host tomato worm.

The Tomato Dictionary.
Determinate: Tomato plants whose vines make little or no growth once fruit is set. Most of the fruit develops at the same time. A desirable trait for those wishing to can or process their crop.
Indeterminate: Vines keep producing new shoots, blossoms and fruit throughout the growing season.
V: A tomato variety with this letter listed after the name is resistant or tolerant to verticillium wilt.
F: Resistant to fusarium wilt.
N: Nematode resistance;
T: resistance to tobacco mosaic virus.
A: Resistance to alternaria.
Podcast Transcript
TOMATO SEED STARTING TIPS (originally aired in Episode 311 of the Garden Basics with Farmer Fred podcast)
Farmer Fred
Right now, you might be seriously thinking about starting some tomato seeds for your garden. Not a bad idea. You’re going to find more tomato varieties on a seed rack or in a catalog than you’re ever going to find in plant form at your local nursery. You’ll find tastier varieties, disease resistant varieties, just an amazing selection of tomatoes. If you’ve ever looked at a tomato catalog, like Totally Tomatoes, or the Tomato Growers Supply Company or Tomatofest, you know you can fill a catalog with nothing but tomato varieties. Well, that’s dangerous for us gardeners when you get something like that. So how do you plant tomato seeds? How do you get them growing so that they’ll take off when you put them in the ground? Well, first of all, Debbie flower is here, by the way. She grows at least one tomato plant a year.
Debbie Flower
I grow one. You grow a lot.
Farmer Fred
Just ask my wife: I grow too many. But being in suburban purgatory, I’ve really slashed the amount of tomato varieties I try, from 40 down to about 10. But still I have fun starting tomatoes. You get into a rhythm and you just love seeing the results. To me, spring is when you can rub your finger along a tomato stem of a young tomato plant and then smell your finger.
Debbie Flower
Savor that fragrance.
Farmer Fred
Yes, you get that tomato fragrance. That’s when you know that spring is here. And there’s nothing like the taste of a tomato, straight from the garden.
Debbie Flower
They try and they can’t duplicate it.
Farmer Fred
No, they can’t. And even I must say though, here we are, recording this in late January, early February. And I still had tomatoes from last year’s garden in the garage. Just taking their time, turning green to red. It took them a while. But that’s okay. It’s nice having a homegrown tomato in late January.
Debbie Flower
Yeah, from the garden.
Farmer Fred
Now obviously it doesn’t have the texture. It’s not that juicy. And the taste isn’t what it is when you pluck it off a vine on a summer evening. But still, you grew it. It’s a keeper variety to me now.
Debbie Flower
Some are advertised as good keepers.
Farmer Fred
There is one even called Long Keeper. And I’ve grown that, and it’s pretty tasteless.
Debbie Flower
Boy, it was it was a long, long time ago that I grew it. I was just pleased to have something to eat.
Farmer Fred
I think it depends on the thickness of the skin of the tomato, whether it can be a keeper like that or not. And actually take the time to turn from green to red. I think the key in picking those late season tomatoes that are green is make sure they’ve already started turning a little bit of color, so you see a little bit of color breaking.
Debbie Flower
That really pale, almost blue green they are more on the yellow side.
Farmer Fred
You put them in a single layer in a box or an egg carton, put it in a nice cool place and they’re not touching each other.
Debbie Flower
They’re not touching each other because they’re still alive. They’re still putting off a little bit of liquid and if they’re touching each other, that’s where you’ll get rot.
Farmer Fred
So you keep them separated. And it might take months but so what? You guys still got a homegrown tomato and it’s still better than a store bought tomato. yes it is. So that’s why you grow tomatoes. But we have to plant them first. Okay, I picked out my seeds. By the way, we should talk about this. How long can you save tomato seeds? And where do you save them?
Debbie Flower
The rule of thumb is that the seeds will last two years if they are stored properly and properly means cool and dry. And so I store my seeds in the refrigerator. That’s cool. And it’s not a freezer.
Farmer Fred
So it’s like 35 degrees?
Debbie Flower
More like 44 or 40.
Farmer Fred
So you keep moving the crisper?
Debbie Flower
No, I just keep them in a Ziploc bag on the shelf.
Farmer Fred
Okay. And nobody’s thought of it as poppy seeds or anything, to put on a bread?
Debbie Flower
No, those are in my freezer.
Farmer Fred
All right, you don’t have to go that far. But you can, if you have the room, I guess in your refrigerator is good, but also store them under your bed, that isn’t a bad place. That’s a cool dry place.
Debbie Flower
Right. It’s controlled temperatures. It’s not like your garage, which is going to be extremely cold in winter and extremely hot in summer. That would be brutal for seeds. And they would not last very long. Seeds are a living organism. There’s a fully formed plant inside the seed and a bunch of food for that seed to live on. And so the seed is in sort of a suspended animation at that point, but it is alive. And in order for it to start to grow, it needs to remain alive. And so it’s living off of that little bit of food that’s in there.
Farmer Fred
Do you keep the original packet?
Debbie Flower
Absolutely.
Farmer Fred
Okay, but it’s not with the seeds. You said you put it in plastic. or do you put the packet in plastic?
Debbie Flower
In a Ziploc bag.
Farmer Fred
All right.
Debbie Flower
Oh, yeah, there’s lots of information on the packet. And then there’s a picture. And so I usually paperclip it shut, some of them stick back down on the flap. If it doesn’t, I roll them a couple of times, use a paper clip to shut it. I group them by season, things that I would start in late winter, early spring; things that I would start later in the season, things I would start in late summer for a fall crop, and edibles versus ornamentals. So when I’m ready, when the season comes on, when I’m going to start seeds, I can pull out a bunch that’s rubber banded together and look through them and see what I have. And what I want to do.
Farmer Fred
Chances are, you probably have tomato packets that are more than two or three years old. But you can still test them to see if they’re any good.
Debbie Flower
You can. Seed testing is a good thing to do. And it was a lab we always did in plant propagation class. And it’s pretty easy. We used 10 seeds, because the math is easy if you use 10. And we used a paper towel. We fold the paper towel down the middle, either direction, whichever way, it doesn’t matter which dimension you want to use. But the 10 seeds are separated from each other on the fold. Fold the paper towel over them. It helps if the paper towels a little damp at that point, and then roll it up like a cigar so that the folded side with the seeds is one end of the cigar. And then the paper towel definitely needs to be wet now. And then stand it up. I think we used a beaker because we were in a lab. But you can use a mug or something and then put the whole thing in a ziploc bag and zip it shut in a warm place. And if the seed packet will tell you that the seeds should germinate in seven to 10 days, we would then check it in seven days and count how many had germinated. The reason for standing the cigar up in the beaker or mug is that the roots will then grow down and it’s easier to see which seed produced those roots. You can lay it on the counter, but when the roots start to grow, they go all over the place. And it’s hard to tell how many seeds actually germinated with growing laying down.
Farmer Fred
Do the stronger seeds produce longer roots?
Debbie Flower
I don’t know if that’s proven or not. Stronger seeds tend to have more food. The bigger seeds tend to have more plant food in them and they tend to last longer. Sometimes they actually produce bigger plants, but I don’t have any data about that.
Farmer Fred
Okay, you’ve done the paper towel test. And let’s say you had 10 out of 10.
Debbie Flower
10 of 10 means I can take one seed and put it where I want one plant to grow and I should get 100% germination.
Farmer Fred
Well it’s a tomato seed, so you’re probably going to be putting it in a container indoors and in a seed starting mix.
Debbie Flower
Yes, more than likely, probably with a little piece of paper towel attached to it. So that’s what the students always wanted to do is grow this now. And so then we had to cut around the seeds. They often stick to paper towels. I know you like to use coffee filters, which do not stick as much. The roots are very tender at this point. And if the plant has started to come out of the seed as well that’s very easily snapped in pieces. It’s full of water. So we would just cut around the germinated seed including some of the paper towel and plant the whole thing into a container.
Farmer Fred
It can figure its way out of that. And how deep would you plant it?
Debbie Flower
The depth to seed planting is related to the size of the seed, you want to cover a seed with an amount of soil that is equal to two to three times the narrowest part of the seed. Tomato seeds are maybe as thick as a piece of paper, maybe a little thicker than that.
Farmer Fred
Yeah, they’re not very thick.
Debbie Flower
Let’s say an eighth of an inch. In their narrowest dimension. We’re not talking top to bottom on the round side, we’re turning it on its side, it’s laying flat on the table. And that’s from the table up, is its narrowest dimension. And that’s about an eighth of an inch. So I would cover them only with a maximum of about a quarter of an inch of media. And it would be moist media. I always moistened my media before I put it in the container. And before I put it on top of the plant. A reason for that is media can be difficult to wet. So if you fill your container first and then water it, it may not get wet all the way down. And if it doesn’t, your roots won’t grow there.
Farmer Fred
Well, that’s one reason why, when I use a commercial seed starting mix, I will dump that bag into a bucket, fill it with water and let it sit overnight. And then drain it the next day by putting it all into a five gallon plant container where there’s holes on the bottom and the water can drain out. But the soil mix stays in the bucket. It’s wet, so I’m going to work with it that day. So I can get in there and grab a nice muddy mess. And bring it out, bit by bit, and throw it in a container and then put the seed down and then sprinkle on some more of that wet soil - the seed starting mix - on top. And that works.
Debbie Flower
I do it differently. I use kitty litter boxes, not the ones that kitty litter comes in. But the boxes that sit in the house where the cat uses the kitty litter the plastic box. I mix. I never use anything right out of the bag, I always add a little bit more of the rock component such as perlite, or vermiculite. It would be vermiculite in this case of seed starting because they’re small and lightweight particles. That’s what you want in a seed starting mix - small and lightweight particles. And then I’ll add some water with the hose and use my hands. Maybe I just enjoy that mixing with my hands of the media to get it wet all the way through. Then I’ll fill my containers, put the seed on top, put a little bit of more of the moist media and I always add a little bit of vermiculite on top. Vermiculite is expanded mica, I think of it like an accordion in that it’s got layers like that with spaces between them. And it holds moisture really well. Because of those layers, how thin they are and how close together they are. A few big dangers in starting seed - one is that your seeds dry out, they dry out then they die, and it’s all over. Another is that the temperature gets too extreme one way or another. But the vermiculite helps with the water problem.
Farmer Fred
You left out another cause of demise. The soil is too wet, right? Then you have what’s called damping off, which is so sad because you get this nice little baby plant growing it might have a cotyledon or it might even have two true leaves. And then it just falls over.
Debbie Flower
Come over the next day and the whole flat of them just all laid down in the same direction. Yeah, damping off is a fungus that grows at the exact temperatures and humidity and moisture that seedlings germinate. And it eats young seedlings, that’s the only thing it eats. If you’ve got your first true leaves, the stem of the plant is too thick for the damping off fungus to consume it. So it’s right when they’re first germinated, that it consumes them.
Farmer Fred
I would then start raising red flags around what sort of soil mix that I used. That happened and I’d probably switch whatever I was doing for a soil mix.
Debbie Flower
You want to make sure when you’re starting seeds that your containers are immaculately clean, that you’ve washed them in the sink and there’s no trace of any media leftover in them. And if I’m starting drought tolerant plants, which tend to be more sensitive, I have found damping off on things like tomatoes, I will actually make a 10% bleach solution. And I will put my containers, my washed containers, washed and rinsed, in that for about 10 minutes to disinfect them and then just let them air dry and I use fresh media. I will reuse my media all the time, but not for starting seeds. For starting seeds I use clean containers and fresh media.
Farmer Fred
Knowing you, I bet those containers become clean at the end of the season, not the beginning of the next season.
Debbie Flower
They become rinsed out at the end of the season when I empty a container of a plant that either I put it in the ground or it didn’t survive. I washed the container out right away. But if it’s because the plant didn’t survive If I want to know why it didn’t survive, did it rot? If it rotted, then I throw the media out. I do not save it. If it just dried out because the battery on my automatic irrigation system died while I was out of town, then I will reuse that media.
Farmer Fred
All right, we’ve planted that seed. I bet that seed wants some bottom heat.
Debbie Flower
Yes. And our container needs to have drainage, right? So we don’t have that buildup of moisture. Yes, bottom heat is ideal. I spent years starting seeds without bottom heat, because I didn’t have the money to invest in it. Then we got rid of our water bed and I use the the heater for the water bed, which works very well. If you see one at an estate sale or someplace like that, snap it up, the temperature is perfect. And the size is nice, and they’re water resistant. So I used that for a long time. That was all I had. And then I was able to buy an official heat mat for starting seeds. And that helps tremendously. You get much more even germination. It’s faster germination. And it keeps the media warm. You can start in an unheated greenhouse, as long as you’ve got that bottom heat as long as the media is warm.
Farmer Fred
And when you have that bottom heat, you will get around probably 70-75 degrees, it’ll get off to a good start.
Farmer Fred
Just because I don’t trust the seeds, I will start several seeds, like three seeds in a three inch container, thinking Oh, two of them aren’t going to make it, And I’ll have one, that I can just leave in the three inch container. Well, of course, they all sprout. So that means I have to, at some point, transplant them into their own three inch pot. What is the ideal stage for doing that?
Debbie Flower
When you see the first true leaves.
Farmer Fred
The first true leaves. Not the second or third, but the first true leaves. It that because there’s less roots and thus less damage?
Debbie Flower
Yes, that’s the danger in in thinning. If they’re right next to each other, you’re going to risk losing both of them if you try to separate them and put them in their own containers. At that point you would thin and when you thin, you take scissors and just cut one off. If you’ve planted them as if I’m going to go your route, I will try to plant them in three different corners of the pot if I think I’m going to separate them over time. And then I’ll just cut the media apart and use that the plant in a column of media and move it into another container.
Farmer Fred
Giving them room to grow is very important. That’s one thing I’ve learned over the years is that as that tomato grows, you realize that tomato is going to be growing and growing quickly for about eight weeks before you can transplant it into the yard, when the time has come, when nights are above 50-55 degrees on a regular basis. And the soil temperature is also above 55-60 degrees at that point, as well. Give it room and don’t be shy about using your one gallon containers. That’s to move those three inch plants into a one gallon pot. That will let them take up a heck a lot more room and more water. Yes, for a short period of time, you’re gonna have healthier plants, and possibly sooner tomatoes, right? I did that last year, a little test with the variety I think it was Bodacious I tried this on. And I tried, as I did for years, just growing them in that three inch pot until the end of April, and then planting them in the garden while hardening them off the last couple of weeks of April, gradually increasing them to more light and more wind. The ones in the one gallon container, I transplanted back in the first week of April. So they had four weeks in that one gallon container. And I planted that, at the end of April, I planted the three inch pot at the end of April. I also planted them at the beginning of April to to see well, what will happen in that situation. And they really prefer being planted at the end of April, when the soil is warmer here in USDA zone nine. And did I get tomatoes sooner from the ones in the one gallon containers? No, but it was close.
Debbie Flower
It was a fun test. When you put them in the field. Did you bury their stems?
Farmer Fred
Yes, of course. And even by then if they’re in a one gallon container, they could easily be a foot and a half or two feet tall. Right? And instead of burying them, I lay them in a trench.
Debbie Flower
Yes, you don’t want the stems necessarily to go very deep. There isn’t as much oxygen in the field soil deep down, as there is near the surface. So yes, you create a trench, and tomatoes can be buried up to there. Just a couple leaves at the top, you can bury almost as much as you want.
Farmer Fred
So you gently move that head up so it’s sticking above the soil. The trench itself would be six inches deep and wide and whatever the length is, including the root ball. Do you point the roots down in a trench?
Debbie Flower
No.
Farmer Fred
The roots can figure it out. Okay, they’re smart.
Debbie Flower
Yeah, they have what are called tropisms. And that’s reaction to a stimulus trope. Geotropism is reaction to gravity and roots grow toward gravity. Okay. Stems grow away from gravity.
Farmer Fred
Another benefit of our friend Mr. Gravity, roots know which way to go? Yes, they do. And you don’t need to strip the leaves?
Debbie Flower
You do not.
Farmer Fred
All right. And again, that’s going to be at the time of the year that’s appropriate for your area for planting tomatoes. For a lot of people. It’s Mother’s Day. And that’s fine. By the way, you don’t have to do all this tomato planting on one day like April 28. You could do it here in USDA zone nine from the end of April, all through May, through the first part of June.
Debbie Flower
Depending on how long the growing season is you have. Some plants and tomatoes will produce in 55 days, that’s probably the shortest season tomato, cherry tomatoes. So if you have a growing season of 55 days, you just want to make sure that you plant at the beginning of that and get your tomatoes at the other end. If like here we have, I don’t know, how many? 200 days? We have 180. We have a very long growing season. And so we can plant over time and have different crops maturing over time.
Farmer Fred
It is not uncommon for me to put in tomato plants in June because somebody always says, “Hey, you want to try this?” And me being me. goes. “well, yeah, sure.”
Debbie Flower
You’ll find a place for it.
Farmer Fred
And so yeah, it’s fine. It’s because we can get 80 days of growing, even if you planted in mid June, right? If you’re in Minnesota, that’s not so. Also, if we’re in Truckee, California. It’s 6000 feet of elevation or whatever it is.
Debbie Flower
Yeah. Much shorter growing season.
Farmer Fred
“We call it July”, I was told. I don’t know if I ever told you this story. But I was visiting a nursery up in Truckee, which is in the Sierra, on your way to Tahoe and Reno. And it’s at 6000 or 7000 feet. And there was a nursery there, much to my surprise. I figured, well, I can learn a lot here about planting in a really short season climate. My first question to the owner was, “can you grow tomatoes here?” And the owner said, “Yeah, we have a good month. It’s July”. Okay, that’s it, but it’s like, the only month where they have never had a freeze.
Debbie Flower
That is amazing.
Farmer Fred
And I went to their book rack. Remember books, folks? And the book rack had the Sunset Garden book? But Ii was the Sunset Northeastern garden book. The one that they were selling in New England, basically. So like, if you garden in Vermont or Maine or up that way, you would have the northeastern garden book,a much smaller book than the Western garden book. Yes, but perfect, if you live in Truckee, yes. For the plants that would do well there.
Debbie Flower
Yes, there are places that can’t grow tomatoes well, like the Pacific Coast properties that butt up to the Pacific coast, because the nights never get that warm.
Farmer Fred
Well not only do they not get that warm, but they also have a lot of humidity and maybe mildew to contend with which tomatoes don’t like. Now I am sure that somebody from San Francisco is going to tell us about their tomato patch.
Debbie Flower
Yes. And that’s where you get into season extenders, covering the plants and trapping heat, things like that.
Farmer Fred
I’ll tell you exactly where there is such a garden. It’s the Call House and garden, the call garden. You should drive up there and see it. The call house and garden is north of San Francisco, it would be in Sonoma County. And it’s part of Fort Ross.
Debbie Flower
Oh, I’ve been there.
Farmer Fred
Okay, well, behind Fort Ross is a house. And it belonged to the Call family. They actually bought Fort Ross back in the late 1800s. And they raised cattle there and they also had an apple orchard there. But they also had a garden his wife wanted a garden. So, being a clever guy, Mr. Call planted rows of eucalyptus against the prevailing wind that came in right off the ocean. They were right on the coast. Yes. And there was this three or four layer thick rows of eucalyptus trees that protected this small patch of land. And they had a wide variety of vegetables and flowers that they could grow there. In that environment.
Debbie Flower
Good exposure to southern sun, I would think would be important. Yeah.
Farmer Fred
Yeah. There’s plenty of sun when, when it comes out.
Debbie Flower
That’s not always often.
Farmer Fred
Yeah, it’s like maybe four hours a day or five hours a day. But still, you plant the right varieties. Right plant in the right place.
Debbie Flower
And there are some tomatoes now that produce what’s called parthenocarpic. Meaning that they do not have to be pollinated to make fruit, kind of like a seedless orange. And that can be beneficial if you never get those sunny days when the bees are traveling. Right.
Farmer Fred
All right, so just enjoy your tomatoes. By the way, we should answer this question too. Do you need to prune that tomato plant?
Debbie Flower
You don’t have to. I was doing some reading about that. When I gardened in New Jersey and I got my bachelor’s degree in horticulture in New Jersey, we were told to prune just so we had two main stems. Tomatoes produce what are called suckers. Think of them as branches that arise between the main stem and the leaf. And this method of pruning in New Jersey took off every sucker except the first one. And we staked them, tied them to a stake and got tomatoes early and enough of them. But here in California, where I live now, if I did that I wouldn’t get tomatoes, I would get fried tomatoes, they would be exposed to way too much sun, and they would dry out and burn. And so there can be a happy medium. Lately, I have not been pruning my tomatoes, because I want protection from the very strong sun, protection of the fruit from the very strong sun. And the research shows that you don’t necessarily get any more tomatoes with pruning, but you can open them up so that they’re easier to see easier to handle, that kind of thing.
Farmer Fred
There are two popular tomato brush fires on the internet about pruning. One is take off the early flowers, so you get more fruit later on. And the other is prune out those armpit hairs, the suckers that grow in the crotches of the stems in order to direct the growth to the existing foliage and fruit that’s on there. And both of those are premises based on research that didn’t have much to do with the backyard gardener. It usually had to do with greenhouse production on a short season basis. And so basically, you don’t have to prune if you don’t want to. Cornell University even bluntly said, when you prune off tomato flowers, you get fewer tomatoes.
Debbie Flower
Yeah, absolutely true. Absolutely true. Yes. If you leave the suckers, they grow to be their own branches that have flowers and fruit on them themselves.
Farmer Fred
They’re tasty too. Yeah. Exactly. All right. Did we cover it? Did we get the tomatoes planted? Did we get them grown?
Debbie Flower
I think we did.
Farmer Fred
All right, let’s go kill some tomato worms. Debbie, thanks for your help.
Debbie Flower
My pleasure, Fred.
By becoming a paid subscriber to the Beyond the Garden Basics podcast and newsletter, I’ll be able to keep buying fish emulsion to feed my plants. My cat appreciates your support!
Thanks for reading and subscribing to the Beyond The Garden Basics Newsletter & Podcast! Smartpots and Amazon provide promotional support.
Fred Hoffman is also a University of California Cooperative Extension Master Gardener in Sacramento County. And he likes to ride his bike(s).